 Save
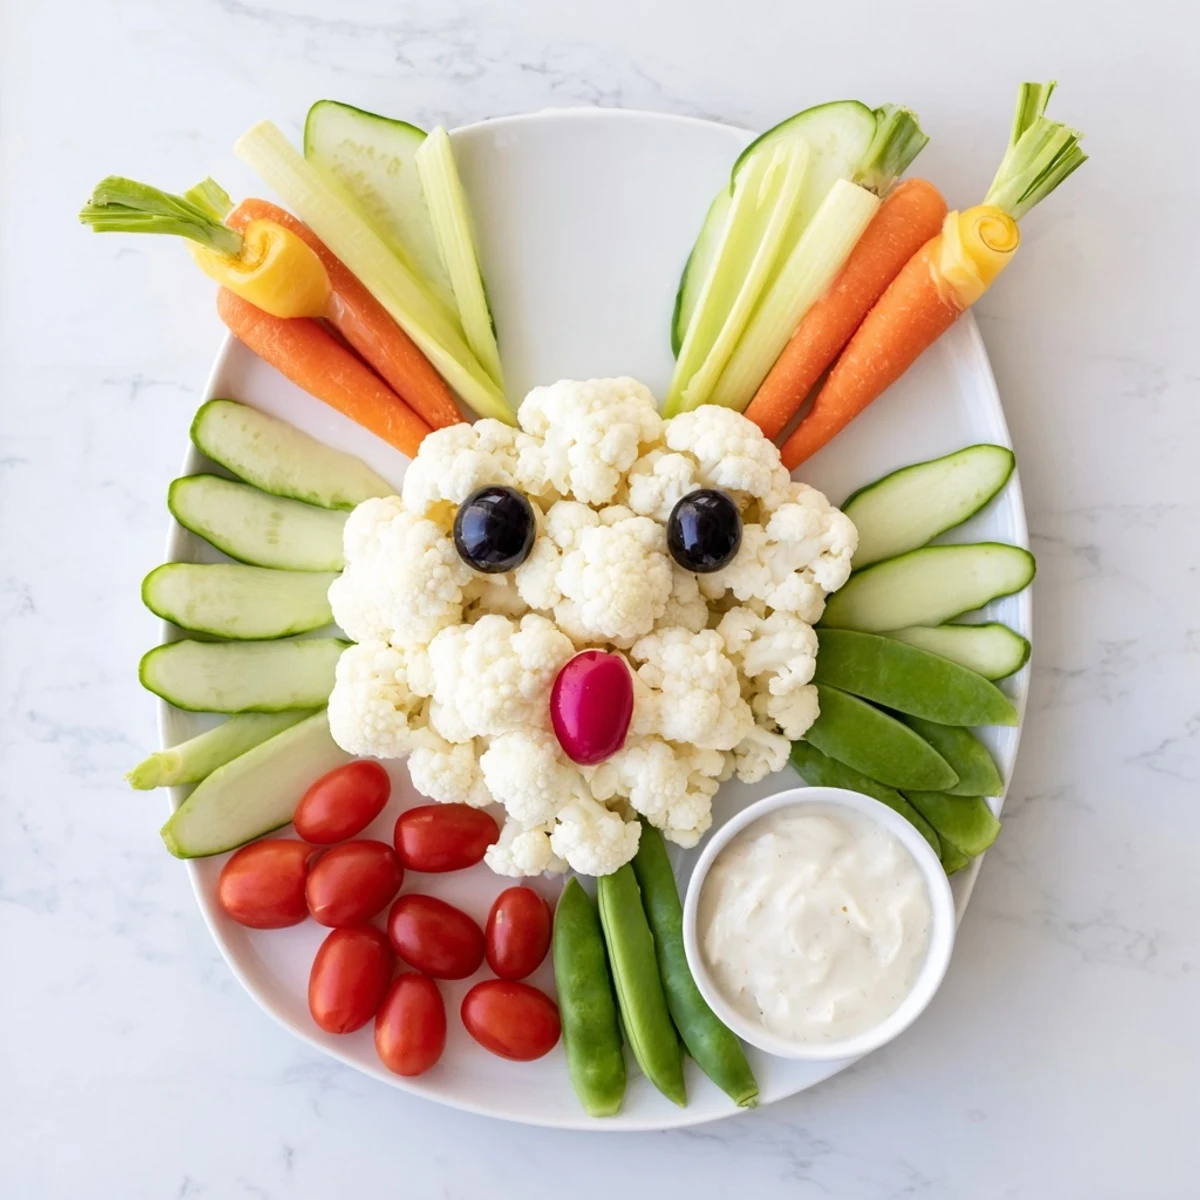
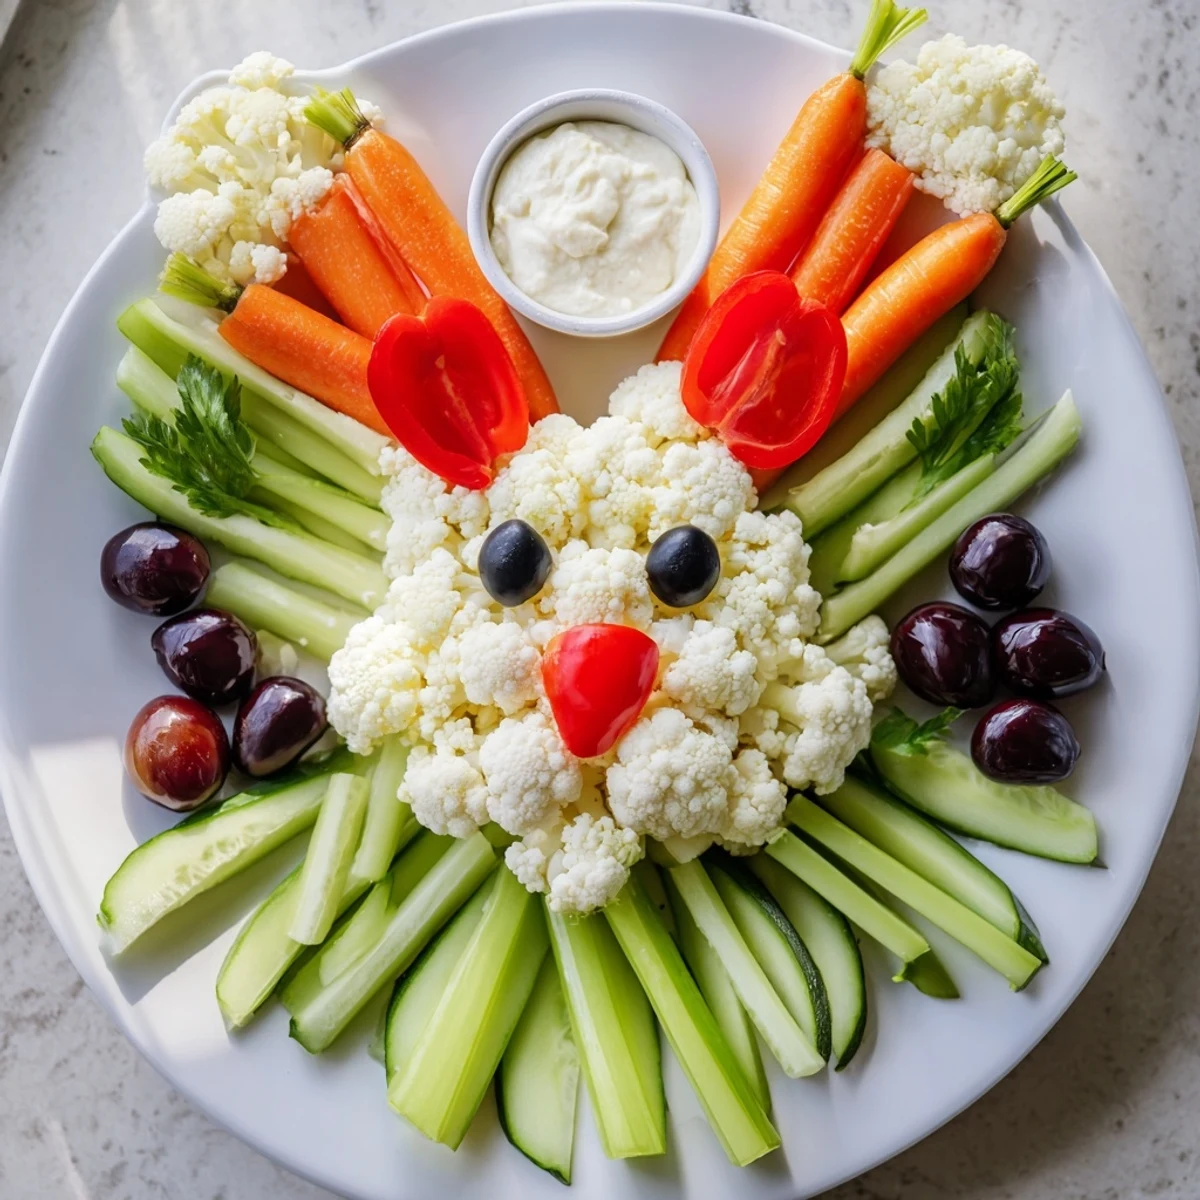
Save Transform ordinary vegetables into a festive Easter bunny centerpiece that will delight guests of all ages. This creative arrangement combines crisp cauliflower, cucumbers, cherry tomatoes, bell peppers, and carrots into an adorable edible decoration perfect for spring brunches, Easter gatherings, and outdoor parties. The assembly takes just 30 minutes and requires no cooking, making it an effortless addition to your celebration menu.
Customize the platter with your family's favorite vegetables and serve with ranch dressing or hummus for dipping. The vibrant colors and playful presentation make healthy eating irresistible, especially for children who might otherwise shy away from vegetables.
Last Easter, my niece stared skeptically at the veggie tray until I arranged it into a bunny shape. Suddenly she was grabbing carrot whiskers and cauliflower clouds like she'd discovered treasure. Now it's the one appetizer that disappears faster than the chocolate eggs.
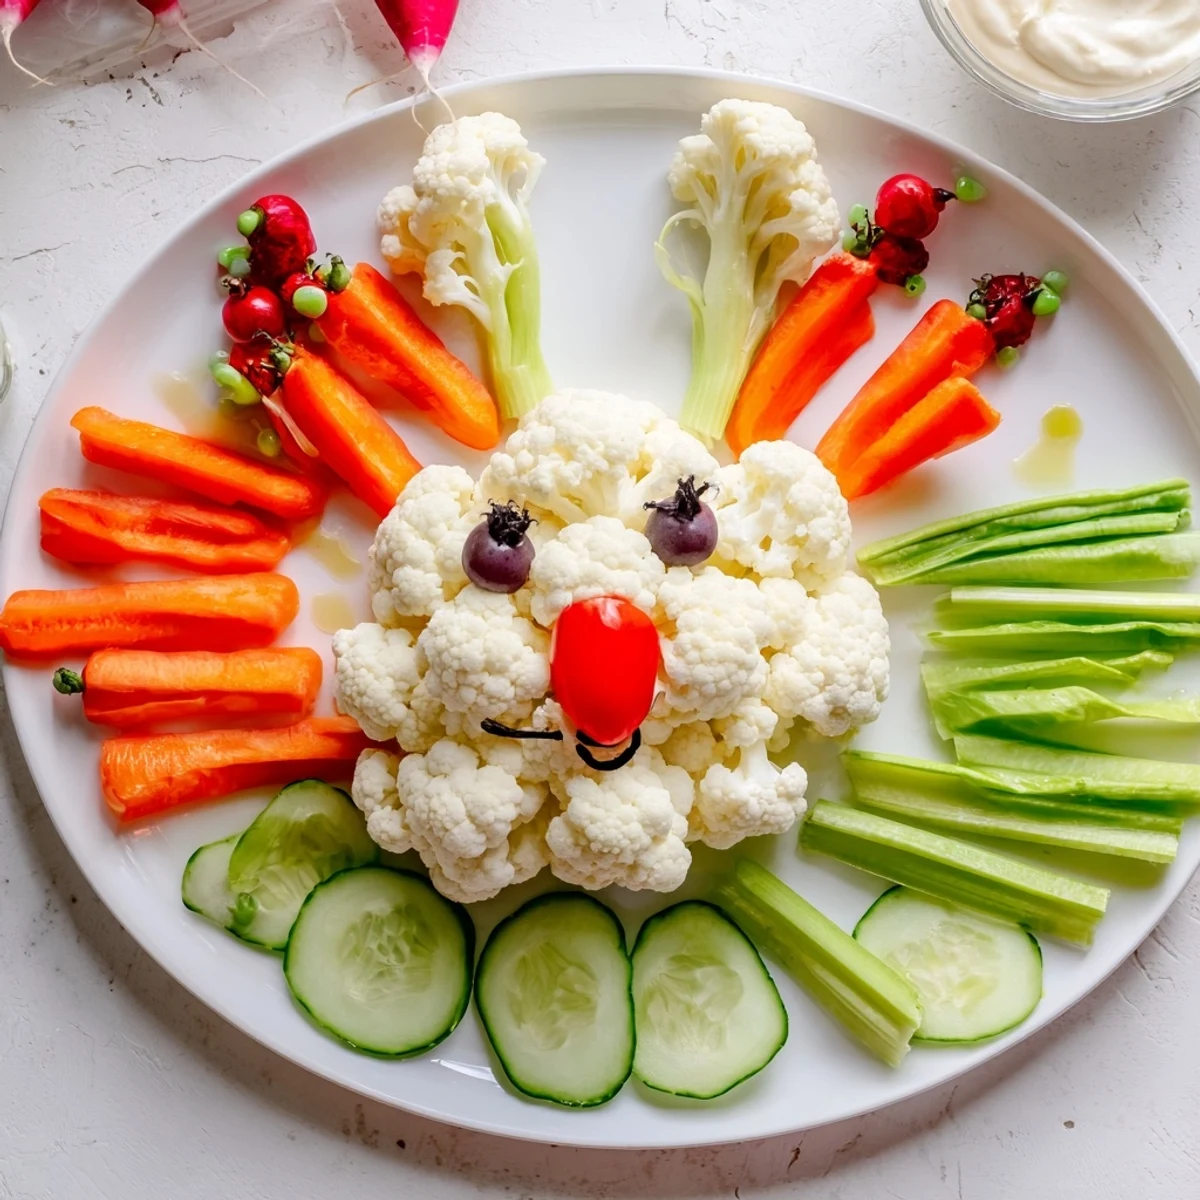
My sisterinlaw showed up late to our brunch last year and laughed so hard she nearly dropped her mimosa. Apparently the grocery store was out of cauliflower so she made a bunny with broccoli and it looked like it had a bad hair day. We still ate every single piece.
Ingredients
- 1 large head cauliflower: This forms the fluffy base of your bunny face and that adorable cotton tail so grab the biggest head you can find
- 2 large cucumbers: English cucumbers work best here because theyre straighter and have fewer seeds making perfect bunny ears
- 1 pint cherry tomatoes: These create the rosy cheeks and add bright pops of red all around the platter
- 1 large red bell pepper: You will slice this into strips for the inner ear and a cute triangular nose
- 2 large carrots: Cut these into thin matchsticks for whiskers that look playful and are easy to grab
- 1 bunch celery: Use celery sticks to outline the whole bunny shape and fill empty spaces
- 1 cup sugar snap peas: These add fresh green color and a satisfying crunch
- 2 black olives: These become the bunnys watchful eyes and you can eat any extras
- 1 cup ranch or hummus dip: Place this in a small bowl where the bunnys mouth would be or off to the side
Instructions
- Prep your veggie canvas:
- Wash everything well and peel carrots then cut all vegetables into bitesized pieces or sticks keeping similar items together in bowls.
- Build the bunny face:
- Arrange cauliflower florets in a large oval shape on your serving tray leaving room at the top for ears and make a small separate cluster for the tail.
- Create those ears:
- Slice cucumbers in half lengthwise and lay them in long oval shapes above the cauliflower face then fill the centers with strips of red bell pepper.
- Add the personality:
- Place cherry tomatoes as rosy cheeks low on the face and scatter a few extras around the platter like confetti.
- Give your bunny whiskers:
- Arrange carrot sticks on each side of the face fanning them out slightly so they look playful and fun.
- Fill in the details:
- Add celery sticks and snap peas to outline the bunny shape and fill any gaps so the platter looks abundant and festive.
- Finish the face:
- Place black olives as eyes and cut a small triangle of red bell pepper for the nose right in the center.
- Set up for dipping:
- Put your ranch or hummus in a small bowl either where the bunnys mouth would be or beside the tray for easy reaching.
 Save
Save My dad who claims to hate vegetables stood at the Easter table picking apart the bunny ear for twenty minutes. He kept pretending he was just fixing the arrangement but we all knew what was happening. Now he requests it every year.
Making It Your Own
Broccoli makes surprisingly cute ears if you cannot find good cucumbers and radishes add beautiful pink accents. I have used yellow bell peppers for a sunshine bunny and even made a mini version on a plate for toddlers.
Dip Pairings
Ranch is the classic choice but hummus especially roasted red pepper version adds incredible flavor. For something different try herbed Greek yogurt dip or even a spicy avocado dip that guests find unexpectedly addictive.
Assembly Strategy
Start with the cauliflower face and get that oval right before adding anything else. Work from the center outward and step back frequently to see the whole picture. Take a picture when you are done because it will be gone fast.
- Set up your workspace with all ingredients prepped and ready before you start arranging
- Keep a damp paper towel nearby to wipe the tray edges as you work
- Have extra vegetables on hand to fill in any sparse spots that appear
 Save
Save There is something joyful about eating food that makes you smile before you even take a bite. Happy Easter and may your vegetable bunny disappear as quickly as mine always does.
Recipe FAQ
- → How far in advance can I make the Easter bunny veggie tray?
-
Prepare the vegetables up to 24 hours in advance and store them in separate airtight containers in the refrigerator. Arrange the bunny shape on the serving tray 2-3 hours before serving to keep everything fresh and crisp.
- → What vegetables work best for creating the bunny shape?
-
Cauliflower works perfectly for the face and tail due to its white, fluffy appearance. Cucumbers provide structure for the ears, while cherry tomatoes add cheerful color for cheeks. Red bell peppers create vibrant inner ears, and carrots sliced into thin sticks make ideal whiskers.
- → Can I make this platter vegan-friendly?
-
Absolutely. Simply serve with plant-based dip options like hummus, guacamole, or vegan ranch dressing instead of traditional dairy-based ranch. Check labels carefully to ensure all ingredients meet your dietary preferences.
- → What size serving tray do I need for this arrangement?
-
A large rectangular or oval platter approximately 16-20 inches in length works best. This provides enough space to create the bunny shape with proportionate ears while leaving room for decorative vegetables around the edges.
- → How do I prevent vegetables from wilting or browning?
-
Keep cut vegetables refrigerated until assembling. If preparing ahead, toss apple slices or other produce prone to browning in lemon juice. Cover the finished tray with damp paper towels and plastic wrap to maintain freshness until serving time.