 Save
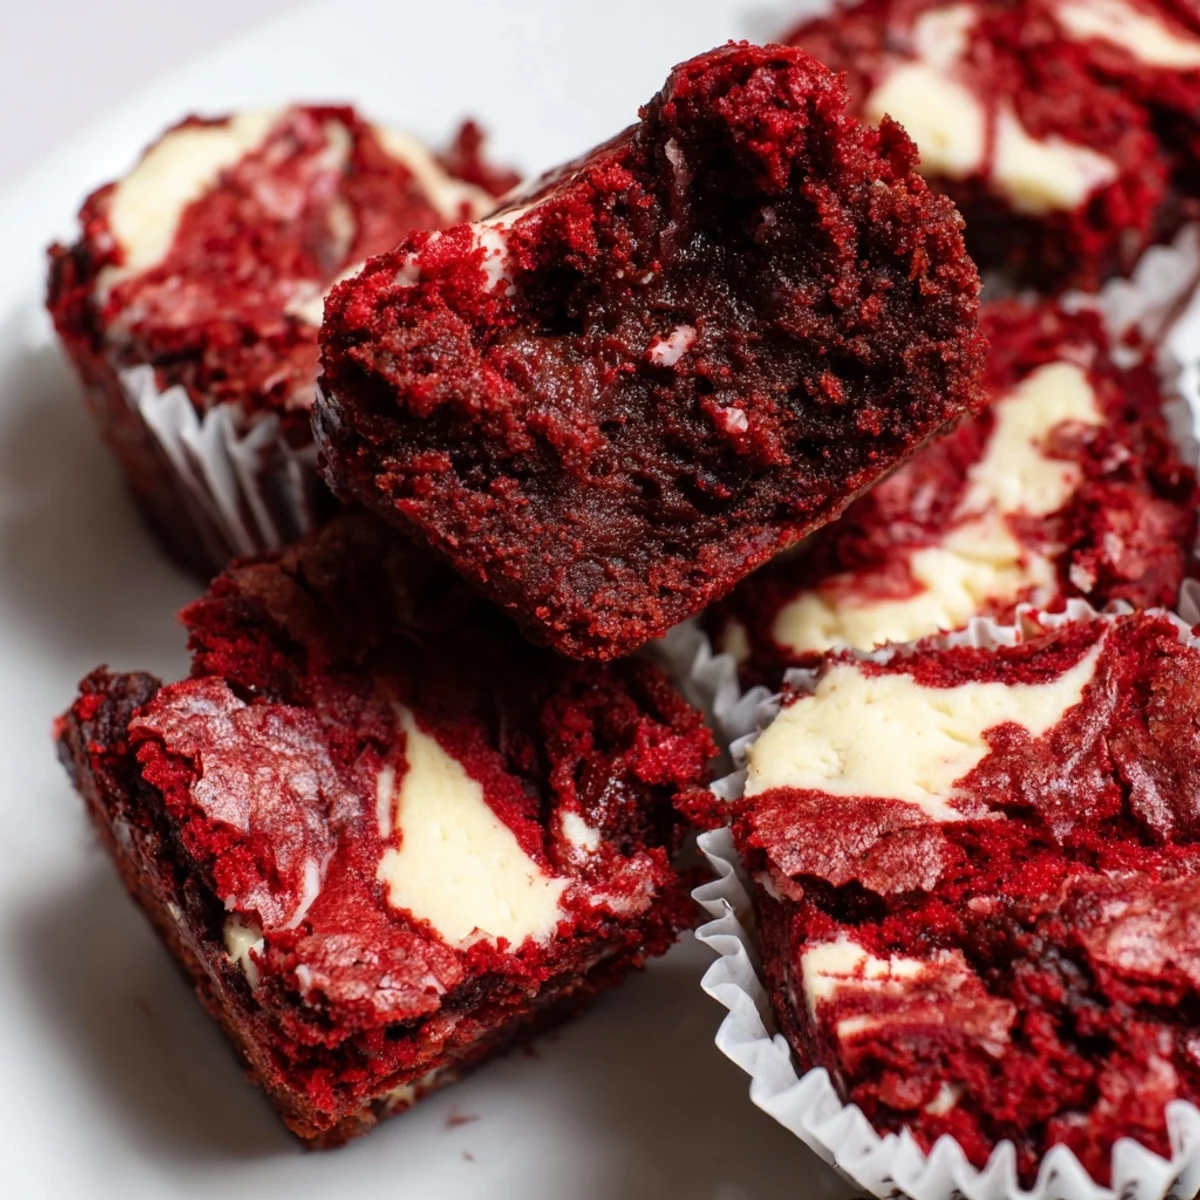
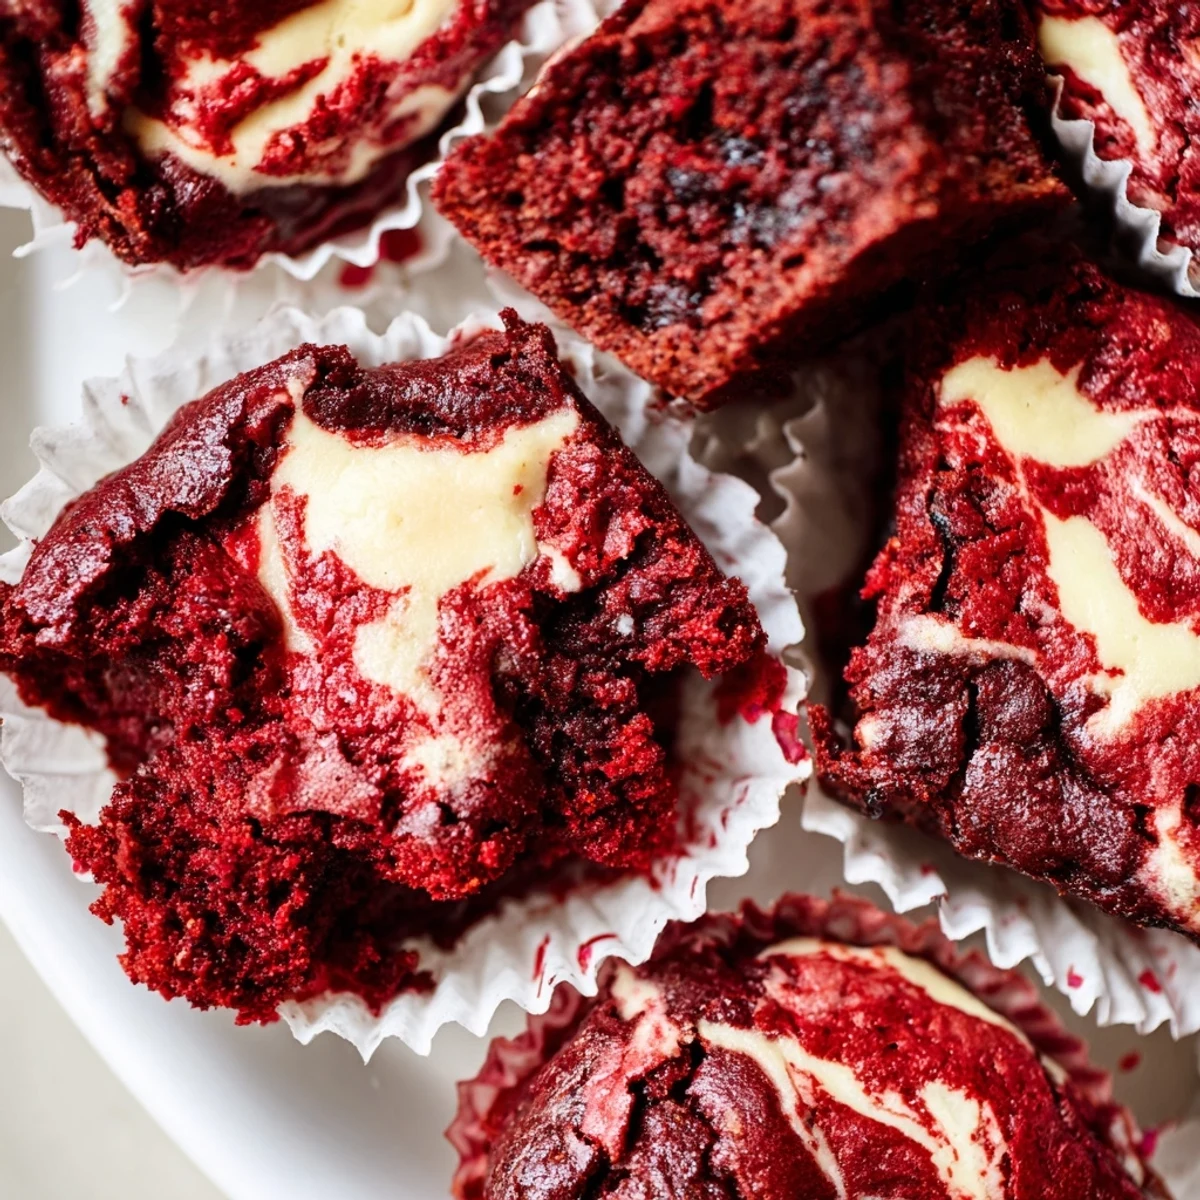
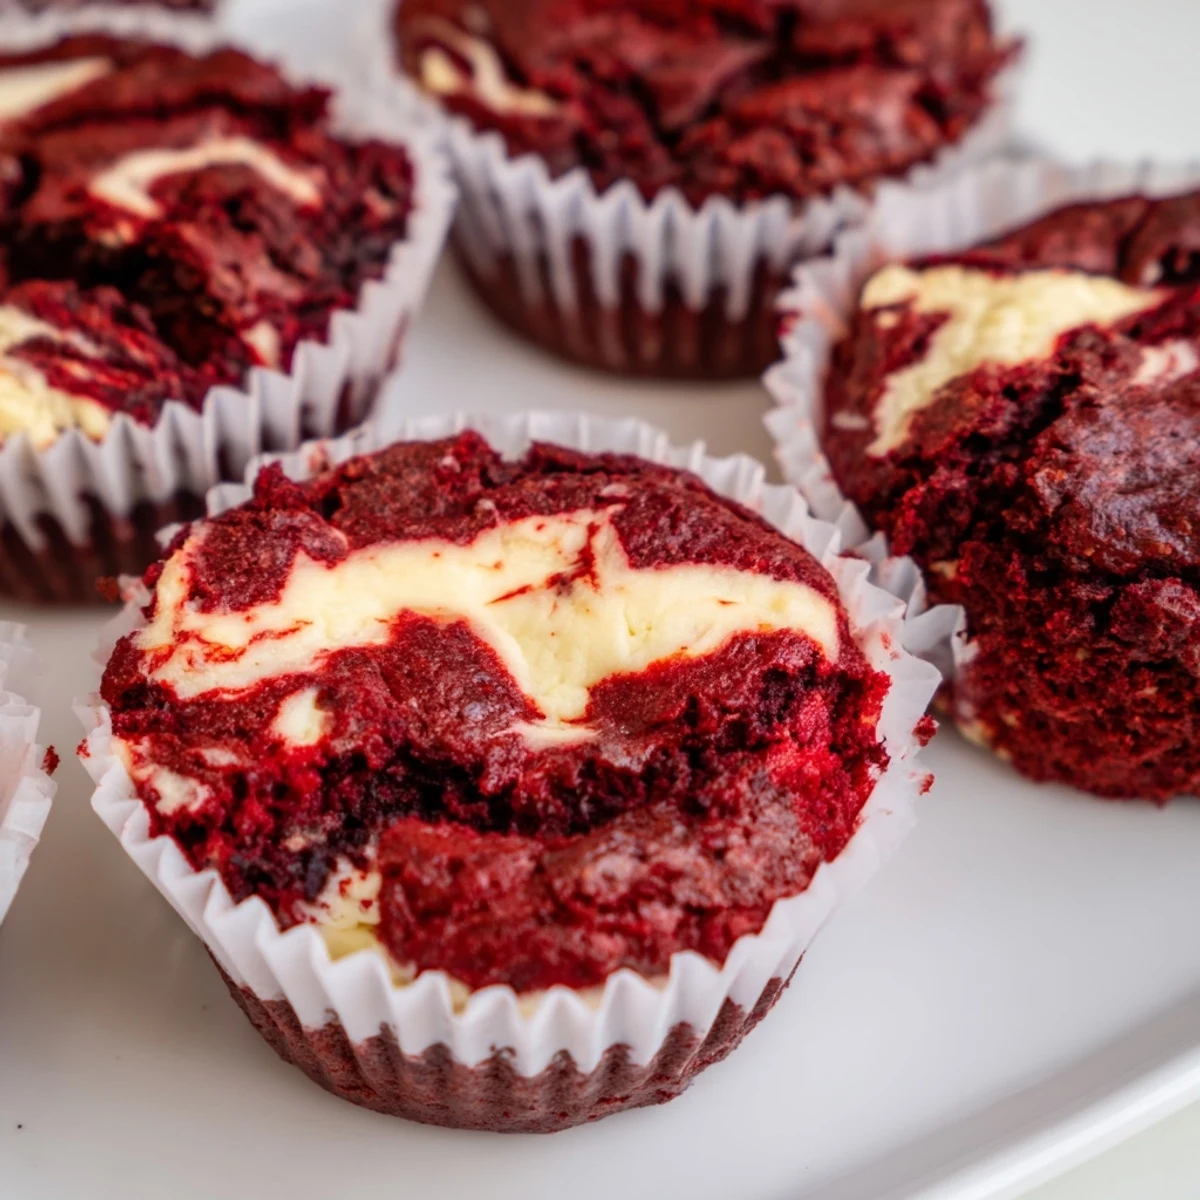
Save These bite-sized treats combine the classic flavors of red velvet with rich, fudgy brownie texture. Each mini morsel features a beautiful marbled pattern created by swirling tangy cream cheese filling through the vibrant red batter. The result is an irresistible combination of chocolate and cream cheese that's perfect for sharing at gatherings, packaging as gifts, or enjoying as an indulgent snack.
My sister called me at 11 PM one night, panic in her voice, needing something red and impressive for her office Valentine's party the next morning. I'd never attempted red velvet in bite form before, but somehow these little beauties came together in that midnight hour, and I've been hooked on the format ever since. Something about the swirl against that deep red makes people think you spent hours when really, it's just clever layering in miniature form.
I made these for my book club last February, and honestly, the conversation stopped when I brought out the platter. They're the kind of treat that photographs beautifully but disappears even faster. One friend asked for the recipe before she'd even finished her first bite.
Ingredients
- Unsalted butter: Melted and slightly cooled, it creates that dense fudgy texture we love in brownies
- Granulated sugar: Provides sweetness and structure, helping create that crackly top
- Large egg: Room temperature eggs incorporate better and give you that tender crumb
- Red food coloring: Gel coloring gives you that vibrant restaurant quality red with less liquid
- All purpose flour: Just enough to hold everything together while keeping it fudgy
- Unsweetened cocoa powder: The base of our red velvet flavor, subtle but essential
- Cream cheese: Full fat and softened to room temperature for the smoothest swirl
- Egg yolk: Adds richness to the cream cheese layer and helps it set beautifully
Instructions
- Prep your pan and oven:
- Heat your oven to 350°F and line a 24 cup mini muffin tin. Those paper liners will save you so much cleanup time.
- Make the red velvet batter:
- Whisk melted butter and sugar until completely smooth, then beat in the egg, vanilla, and red food coloring until the color is evenly distributed throughout.
- Add the dry ingredients:
- Sift together your flour, cocoa powder, and salt, then fold them in gently until just combined. The batter will be thick and glossy.
- Prepare the cream cheese swirl:
- Beat softened cream cheese with sugar, egg yolk, and vanilla until absolutely smooth. Take your time here, lumps will show in your final product.
- Layer and swirl:
- Drop one tablespoon of brownie batter into each cup, then add a teaspoon of cream cheese mixture on top. Use a toothpick to gently marble them together without over mixing.
- Bake to perfection:
- Bake for 23 to 25 minutes until the centers are set and a toothpick comes out with moist crumbs. They'll continue cooking slightly as they cool.
- Cool completely:
- Let them rest in the pan for 10 minutes before moving to a wire rack. The cream cheese needs time to set or they'll be too soft to handle.
 Save
Save My daughter now requests these for every school event and class party. She's started helping with the swirling step, and honestly, her marbled patterns turn out more artistic than mine sometimes.
Making Them Ahead
You can bake these up to two days in advance and store them in an airtight container in the refrigerator. The flavors actually develop and meld together, making them taste even better on day two. Let them come to room temperature for 20 minutes before serving for the best texture and flavor.
Swirl Like a Pro
The trick to that perfect marbled look is dropping your cream cheese mixture in small circles rather than spreading it. When you drag your toothpick through, alternate between circular motions and straight lines for varied, artistic patterns. Wipe your toothpick between cups to keep your swirls clean and distinct.
Customization Ideas
Fold chocolate chips into the brownie batter for extra texture and intensity. Try adding a touch of almond extract to the cream cheese swirl for a sophisticated flavor twist that pairs beautifully with red velvet.
- Crush freeze dried strawberries on top before baking for a fruity accent
- Sprinkle sea salt over the cream cheese swirl for a sweet and salty finish
- Add white chocolate chips to either layer for extra sweetness and visual appeal
 Save
Save There's something magical about biting into that cream cheese vein through the rich chocolate. Hope these become your go to for whenever you need something impressive but manageable.
Recipe FAQ
- → How do I know when the brownie bites are done baking?
-
Insert a toothpick into the center of a bite. It should come out with a few moist crumbs but not wet batter. The tops should be set and slightly firm to the touch.
- → Can I make these ahead of time?
-
Yes, these can be made 1-2 days in advance. Store in an airtight container in the refrigerator. Bring to room temperature before serving for the best texture.
- → Why is my red color not vibrant enough?
-
Use gel food coloring instead of liquid for a more intense red hue. Gel colors are more concentrated and won't thin out your batter like liquid versions can.
- → Can I freeze these brownie bites?
-
Absolutely. Freeze cooled bites in a single layer on a baking sheet, then transfer to a freezer-safe container. They'll keep for up to 3 months. Thaw overnight in the refrigerator.
- → What's the best way to achieve the marbled swirl effect?
-
Add the cream cheese mixture on top of the batter, then gently drag a toothpick through the center in circular motions. Don't over-swirl or you'll lose the distinct marbled pattern.
- → Can I use natural food coloring instead?
-
Beet juice or pomegranate juice can work, but the red will be more muted. For best results, use gel food coloring specifically designed for baking.