 Save
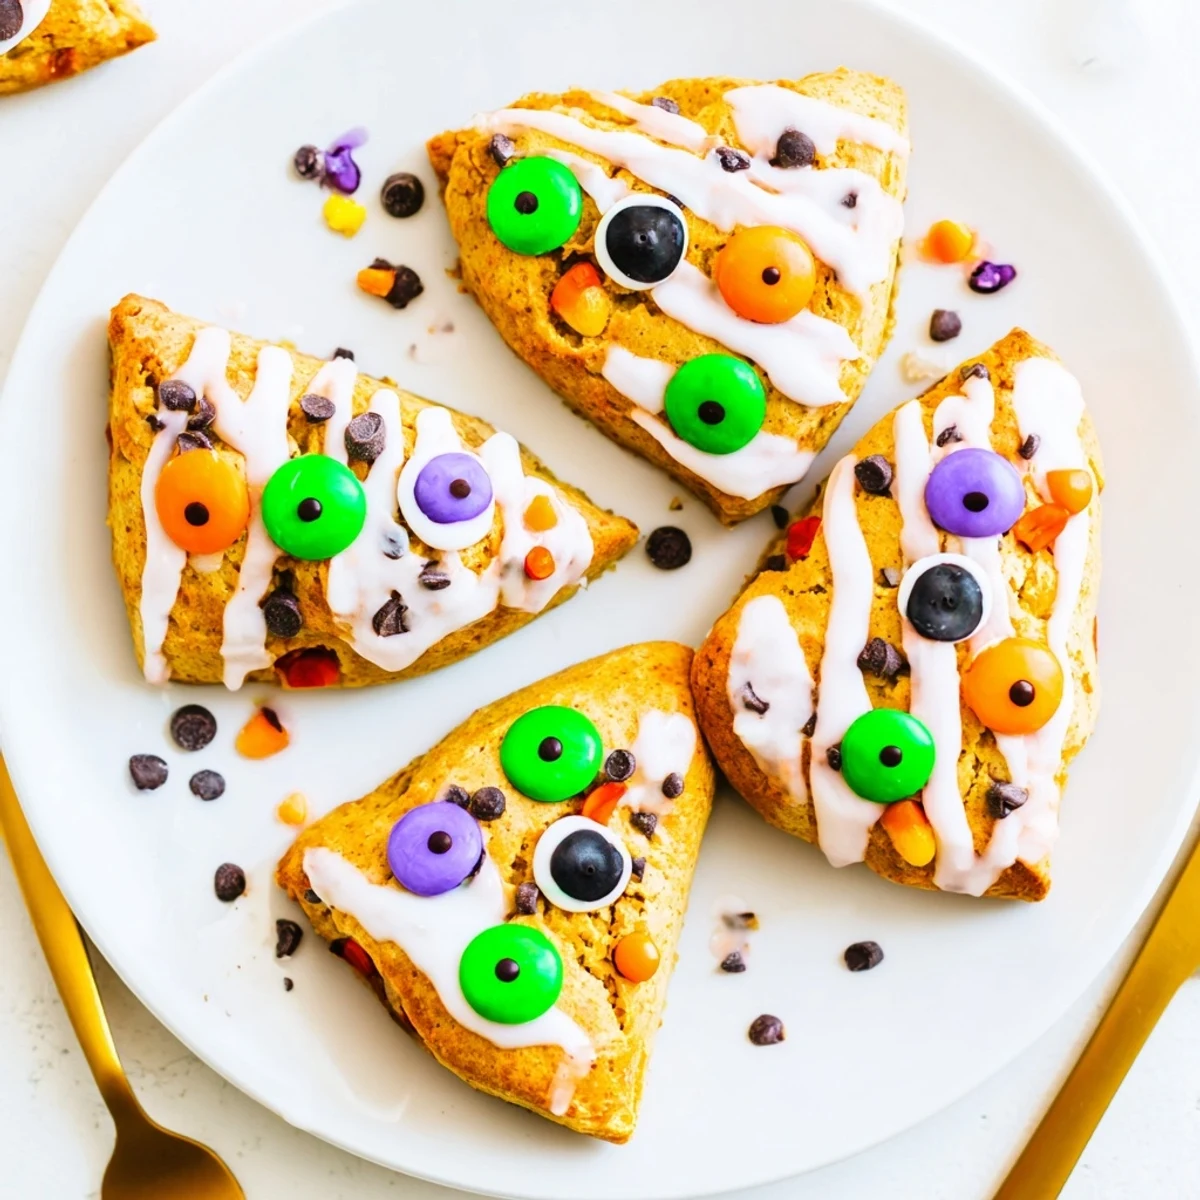
Save These delightful pumpkin scones bring warmth and whimsy to your autumn table. The dough features classic pumpkin pie spices—cinnamon, ginger, nutmeg, and cloves—blended with real pumpkin purée for moist, tender results.
What makes these special is the monster face decoration. Once baked and cooled, the scones get a generous coating of colored glaze in vibrant orange, green, purple, or black. Candy eyes, chocolate chips, and sugar pearls transform each wedge into a friendly monster.
The process is straightforward: mix dry ingredients, cut in cold butter, combine with wet ingredients, shape, and bake. The decorating step is where creativity shines—kids love helping create silly or spooky faces.
These scones freeze well undecorated, so you can bake ahead and add the monster faces before serving. They're perfect for school parties, office treats, or a fun weekend baking project.
The first time I made these monster scones was actually by accident. I had planned to make ordinary pumpkin scones for a brunch, but my niece spotted the unglazed batch and declared they needed faces. We raided the pantry for candy eyes and suddenly became bakery artists, creating the silliest, most charming breakfast treats I have ever seen. Now every October brings requests for these spiced, grinning pastries.
Last Halloween morning, my kitchen became a chaos of colored glaze and spilled sugar pearls. Three adults and two children sat around the table, each convinced their monster scone creation was the masterpiece of the day. The coffee grew cold, nobody cared about the mess, and every single scone disappeared before noon.
Ingredients
- All-purpose flour: Forms the tender foundation of these scones
- Light brown sugar: Adds moisture and a subtle caramel depth
- Baking powder and soda: Work together for that perfect rise
- Ground cinnamon, ginger, nutmeg, and cloves: Create that classic warm spice blend we crave in fall
- Cold butter: Essential for flaky layers, so keep it chilled until the moment you cut it in
- Pumpkin purée: Use pure pumpkin, not pie filling, for the best texture and flavor
- Whole milk: Adds richness to both the dough and glaze
- Powdered sugar: Creates the smooth canvas for your monster faces
- Food coloring: Gel colors work best for vibrant, concentrated glaze shades
- Candy eyes and decorations: Let your imagination run wild here
Instructions
- Get your oven ready:
- Preheat to 400°F and line a baking sheet with parchment paper so nothing sticks
- Whisk the dry mixture:
- Combine flour, brown sugar, baking powder, soda, salt, and all those warm spices in a large bowl
- Cut in the cold butter:
- Work those cubes into the flour until you see coarse crumbs scattered throughout
- Mix the wet ingredients:
- Whisk pumpkin purée, milk, egg, and vanilla until smooth in another bowl
- Bring everything together:
- Pour the wet mixture into the dry and fold gently until just combined, being careful not to overwork the dough
- Shape the scones:
- Turn onto a floured surface, pat into a 1 inch thick circle, and cut into 8 wedges
- Bake to golden perfection:
- Arrange wedges on your prepared sheet and bake for 16 to 18 minutes until firm and golden
- Prepare the colorful glaze:
- Whisk powdered sugar with milk until smooth, then divide into bowls and tint each with your chosen colors
- Create your monsters:
- Once scones cool completely, spread or drizzle the glaze and press candy eyes into the frosting before it sets
 Save
Save My neighbor texted me at midnight last year asking for the recipe after seeing photos of our monster face brunch. She made them the next morning with her three boys and sent me a picture of twelve completely unique, slightly terrifying, absolutely adorable pumpkin creatures grinning from her kitchen counter.
Making Ahead and Storage
You can freeze unbaked scones on a baking sheet, then transfer them to a bag once solid. Bake from frozen, adding a couple extra minutes to the time. Baked and undecorated scones keep well in an airtight container for two days. Glazed scones are best eaten the same day since the moisture from the frosting can soften them over time.
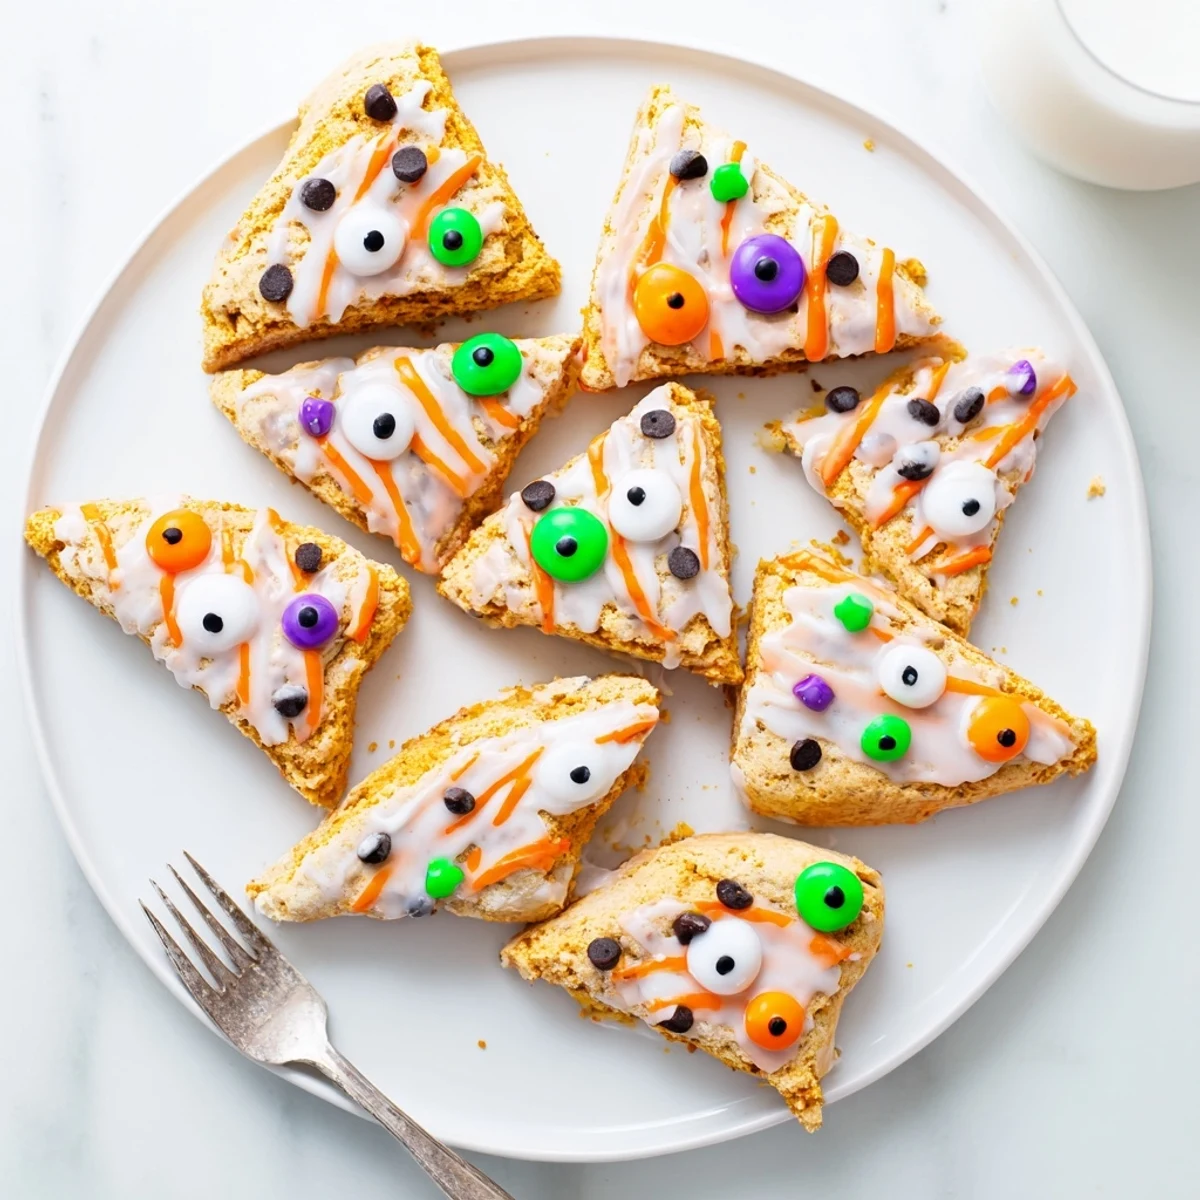
Decoration Ideas
Beyond candy eyes, try using mini chocolate chips for freckles or jagged teeth. Colored sugar pearls make perfect warts or spots. You can pipe goofy smiles, crazy hair, or even small fangs with tinted glaze in a ziplock bag with the corner snipped off. Let each person design their own unique monster personality.
Serving Suggestions
These scones shine at Halloween parties, autumn brunches, or as a weekend baking project with kids. They pair beautifully with hot apple cider, spiced tea, or a strong pumpkin spice latte. Set up a decorating station with bowls of colored glaze and let guests create their own monster faces.
- Set out multiple small bowls of different colored glaze
- Keep decorations within easy reach for little hands
- Have damp paper towels ready for inevitable sticky fingers
 Save
Save There is something wonderfully playful about food that smiles back at you. These monster scones have become a cherished tradition, bringing a little extra whimsy to the autumn kitchen.
Recipe FAQ
- → Can I make these scones ahead of time?
-
Absolutely. Bake the scones and let them cool completely. Store in an airtight container for up to 2 days before decorating. For longer storage, freeze undecorated scones for up to 3 months and thaw before adding glaze and decorations.
- → What type of pumpkin should I use?
-
Use canned pumpkin purée (not pumpkin pie filling) for consistent results. Fresh pumpkin purée works too—roast and purée the flesh, then drain excess moisture before adding to the dough.
- → How do I prevent the scones from spreading too much?
-
Keep your butter cold throughout the process. Work quickly when mixing, and chill the dough for 15–20 minutes if it feels too soft or sticky. This helps the scones maintain their wedge shape during baking.
- → Can I make these without food coloring?
-
Yes. Skip the coloring for a classic white glaze, or use natural alternatives like beet juice for pink, turmeric for yellow-orange, or matcha powder for green. Candy eyes and chocolate chips still create charming faces.
- → What if I don't have candy eyes?
-
Mini chocolate chips, regular chocolate chips pointed-side down, or dots of colored glaze all work well. You can also use small round cereals, raisins, or even draw faces with edible markers after the glaze sets.
- → Can I add mix-ins to the dough?
-
Certainly. Mini chocolate chips, chopped pecans, or dried cranberries complement the pumpkin flavor beautifully. Add up to ½ cup of mix-ins when combining the wet and dry ingredients.