Save
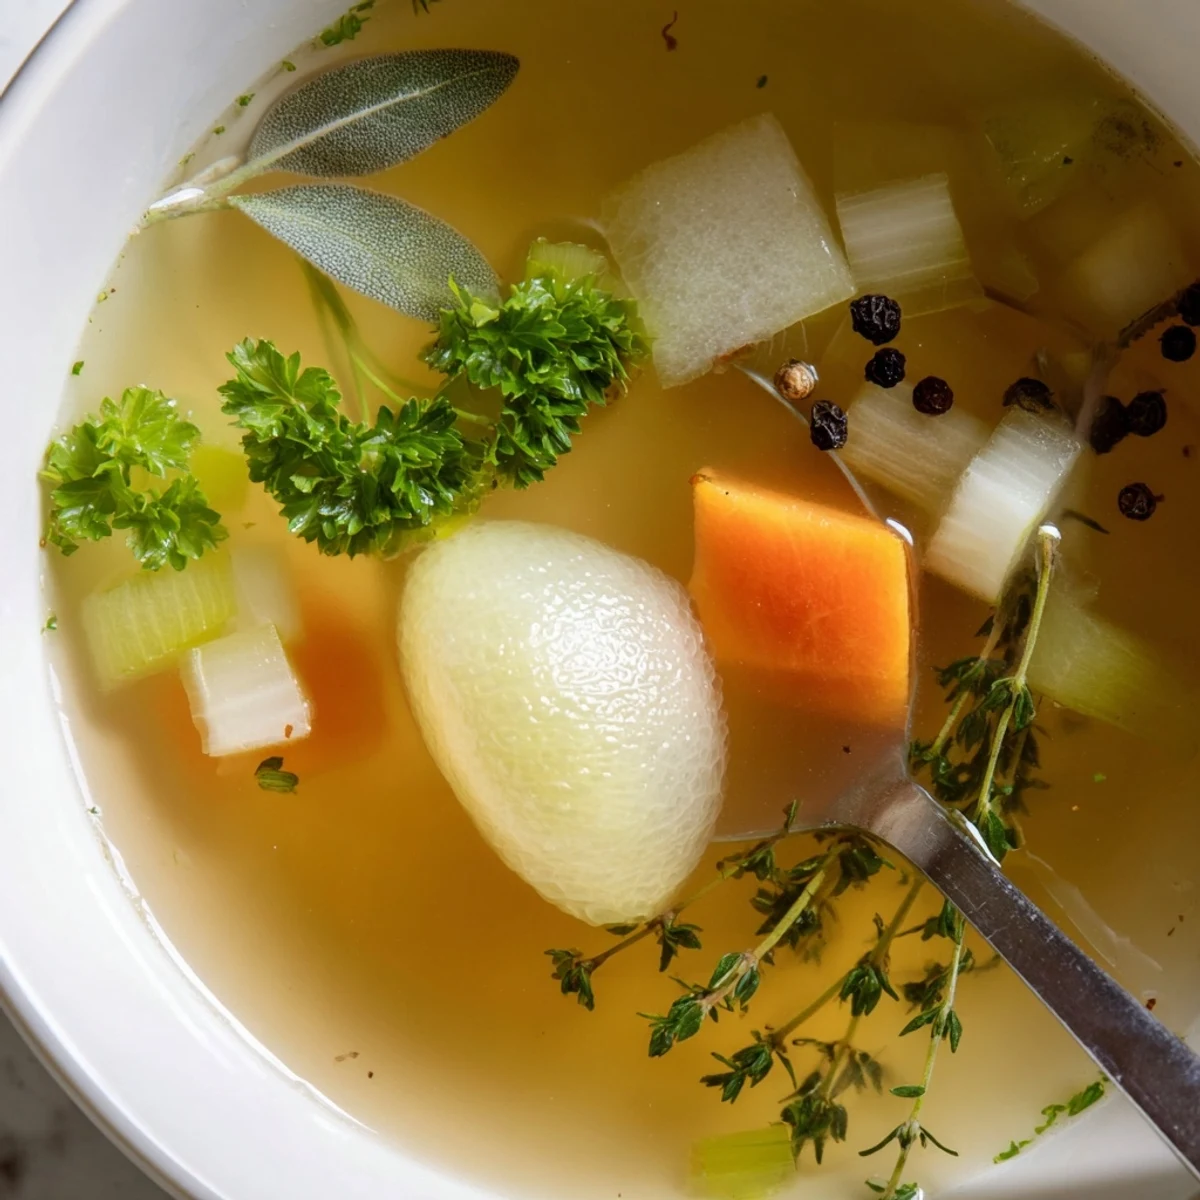
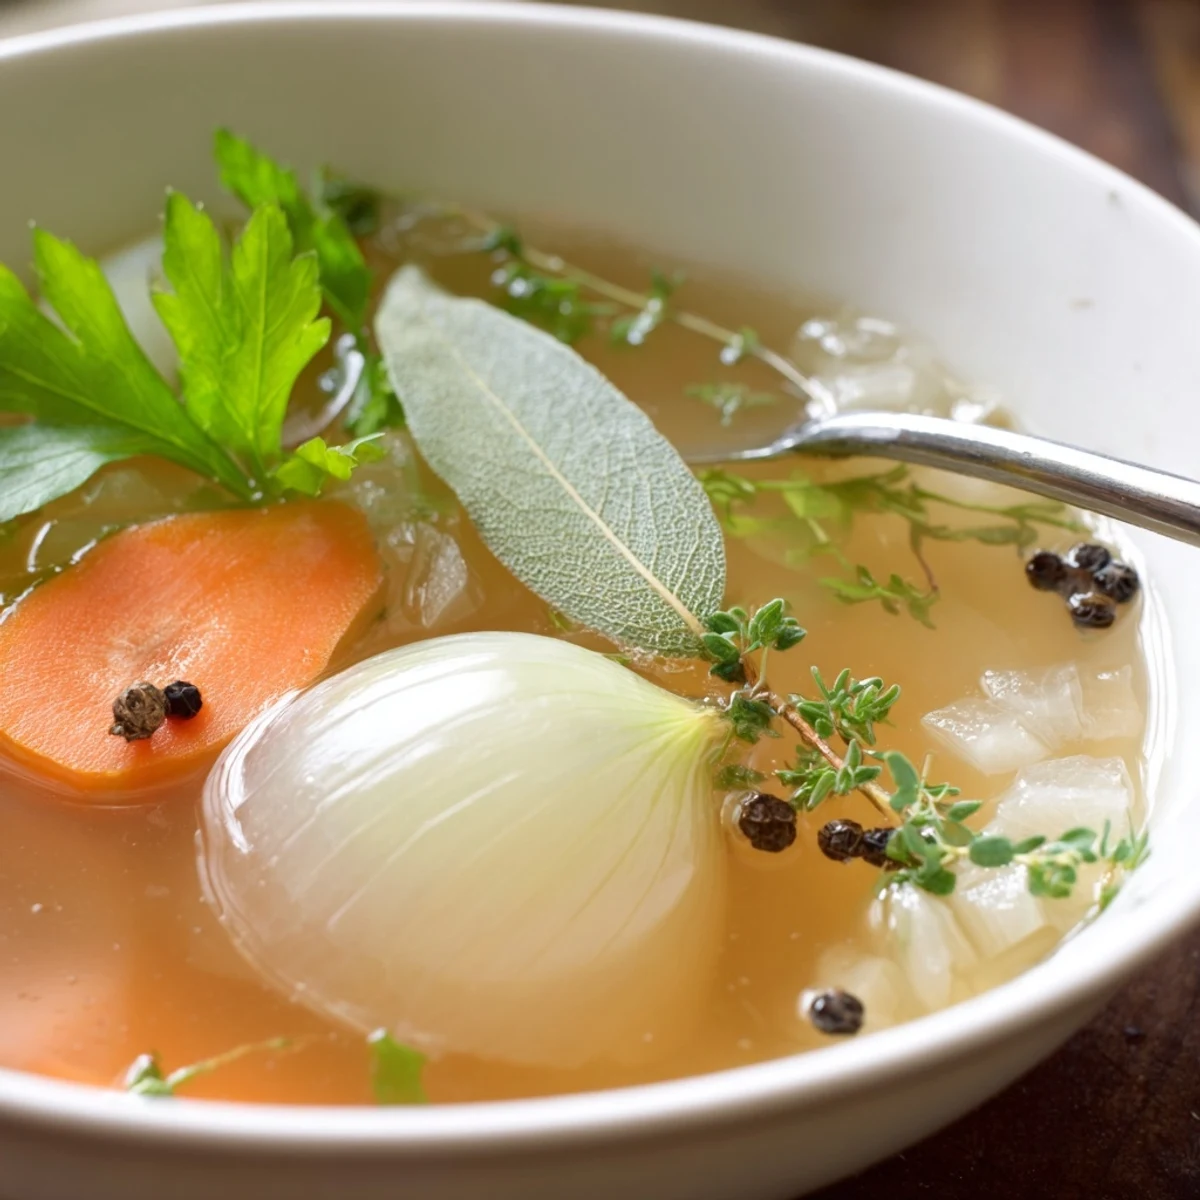
Save This broth combines a medley of fresh vegetables like carrots, celery, onion, and leek with aromatic herbs such as parsley, thyme, and bay leaves. Slowly simmered for an hour, it extracts rich flavors ideal for bases or sipping. Optionally, roasting vegetables enhances depth. Strain to remove solids and season to taste with salt and peppercorns. Suitable for vegan and gluten-free diets.
The first time I made broth from scratch, I wasn't trying to be resourceful or virtuous about it—I just had a pile of vegetable scraps and an afternoon to kill. What surprised me was how the kitchen filled with this warm, savory fog the moment everything hit the simmering water, nothing like the watery disappointment of store-bought cubes. Now whenever I need a proper foundation for soup or risotto, I reach for homemade broth without thinking twice.
I made this broth on a grey November morning when my sister was coming over for lunch, and I wanted something warm to greet her with besides coffee. She sat at the counter while the pot bubbled softly, the steam fogging up her glasses, and we ended up talking for three hours over mugs of the finished broth with crusty bread. That's when I understood broth isn't just an ingredient—it's an excuse to slow down.
Ingredients
- Carrots (2 large, peeled and chopped): They bring natural sweetness and body to the broth—don't skip peeling unless you're using organic, as the skin can cloud the finish.
- Celery stalks (2, chopped): The backbone of any vegetable broth, offering a subtle salty depth that rounds out the flavor.
- Onion (1 large, quartered): Leave the papery skin on if it's clean; it adds color and minerals without affecting taste.
- Leek (1, cleaned and sliced): The mild onion cousin that brings sophistication without overpowering—rinse carefully between layers for hidden sand.
- Parsnip (1, peeled and chopped, optional): If you add it, you'll notice a slightly sweet, earthy undertone that makes the broth feel more complete.
- Garlic (3 cloves, smashed): Smash them gently rather than mincing so they release flavor gradually and you can fish them out if needed.
- Fresh parsley (1 small bunch): Use the whole bunch—stems and leaves both—as the stems actually contain most of the flavor.
- Fresh thyme (2 sprigs): This is what makes it smell like a proper kitchen; it adds a whisper of earthiness without any bitterness if you don't overdo the time.
- Bay leaves (2): Bay gets a bad reputation for being subtle, but it's doing quiet work in the background, pulling everything together.
- Fresh dill or rosemary (6 sprigs dill or 2 sprigs rosemary, optional): Dill gives brightness; rosemary gives intensity—pick based on what you're planning to cook with the broth.
- Black peppercorns (10): Whole peppercorns stay mellow and aromatic; ground pepper would turn bitter after an hour of simmering.
- Salt (1 teaspoon, adjust to taste): Start low because the broth will concentrate slightly as it simmers, and you can always add more at the end.
- Cold water (2.5 liters or 10 cups): Cold water matters because it lets the vegetables release their flavor gently; hot water can make everything taste rushed and muddy.
Instructions
- Prep your vegetables:
- Wash everything under cold water, peel the carrots and parsnip, and chop everything into rough 2-inch pieces—they don't need to be uniform because you're straining them out anyway. This whole step takes maybe ten minutes, and it's worth not rushing because you'll feel more connected to what's about to happen.
- Build your pot:
- Toss all the chopped vegetables, herbs, peppercorns, and salt into a large stockpot—the bigger the pot, the better, because you want enough room for everything to move around gently. Pour in the cold water and give it a stir so the salt dissolves a little.
- Bring it to life:
- Set the heat to medium-high and let it come to a gentle boil—this takes about 10 to 12 minutes, and you'll know it's happening when small bubbles start racing up the sides. Once it's boiling, reduce the heat to low, partially cover the pot with the lid (leaving a gap for steam to escape), and let it settle into a quiet, steady simmer.
- Simmer and skim:
- Let it bubble gently for a full hour—during the first 15 minutes, foam might rise to the surface, and you can skim it off with a spoon if you want crystal-clear broth, or leave it if you don't mind a rustic look. The vegetables will soften, the herbs will fade to pale ghosts, and your whole kitchen will smell like a promise.
- Cool and strain:
- When the hour is up, carefully remove the pot from heat and let it sit for a few minutes while it cools slightly—this makes straining safer and less splashy. Set a fine-mesh sieve or layer of cheesecloth over a large bowl or another pot, and slowly pour the broth through, letting gravity do the work while the solids stay behind.
- Taste and finish:
- Once it's strained, give it a careful taste—blow on the spoon first so you don't burn your tongue—and add a pinch more salt if it needs it. Use it immediately while it's still warm, or let it cool completely in the fridge before storing.
 Save
Save My neighbor once told me that she could always tell when I was home by whether my kitchen smelled like broth or coffee, and somehow that became a comfort—like the broth was a small visible proof that I was taking care of myself and whoever might drop by. There's something generous about simmering broth on the stove, like you're inviting abundance into your kitchen just by showing up.
Why Homemade Broth Changes Everything
When you make broth yourself, you're not just cooking—you're extracting flavor from whole vegetables, and there's no way that compares to rehydrating a powder or opening a carton filled with sodium and mystery. The difference shows up immediately the first time you make a soup with it; the broth becomes the star instead of a background player. It's also remarkably economical once you realize you can use vegetable scraps you'd normally throw away, keeping them in a freezer bag until you have enough to make a batch.
Storage and How to Use It
Fresh broth keeps in the refrigerator for up to five days in a sealed container—you might see a thin layer of fat solidify on top as it cools, which is normal and actually protective. It freezes beautifully for three months, and you can freeze it in various ways depending on how you'll use it: in ice cube trays for single-cup servings, in quart containers for soups and grains, or even in muffin tins for portion control. Beyond soups and risottos, use it as a cooking liquid for grains like rice or quinoa, as the base for a light sauce, or warm it up in a mug with a squeeze of lemon and a pinch of sea salt when you just need something soothing and real.
Flavor Variations to Try
Once you've made the basic version a couple of times, you'll start seeing endless possibilities in your vegetable drawer. Roasting the vegetables first at 400°F for 30 minutes before adding water creates a darker, richer broth with deeper caramelized notes—this is worth doing when you want something more robust for beef-adjacent vegetarian cooking. You can also swap in mushroom stems, fennel, fresh ginger, dried seaweed, or even a tomato or two, each one tilting the flavor in a different direction without complicating the actual process. Some days I make a lighter version with extra dill and lemon zest reserved for fish dishes, and other days I roast everything and add thyme for something that tastes almost meaty. The method stays exactly the same—only the vegetables change—which is why once you learn this, you've learned a thousand broths.
- Roasted vegetables yield a deeper color and more complex flavor, perfect when broth is the main character.
- Each herb or addition should feel intentional based on what you'll cook with the broth, not random.
- Taste as you decide what to add, and remember that you can always make plain broth and customize it for different dishes later.
 Save
Save Making your own broth is one of those quiet skills that makes you feel less dependent on what's on the shelf, and once you've done it once, you'll keep doing it without thinking. It's straightforward, forgiving, and it turns simple vegetables into something your kitchen fills with gratitude.
Recipe FAQ
- → What vegetables are best for this broth?
-
Carrots, celery, onion, leek, and optional parsnip create a well-rounded, flavorful base.
- → Can I enhance the flavor before simmering?
-
Roasting the vegetables at 400°F for 30 minutes adds a rich, robust flavor.
- → How long should the broth simmer?
-
Simmering gently for 1 hour allows the flavors from vegetables and herbs to fully develop.
- → What herbs are included in the broth?
-
Fresh parsley, thyme, bay leaves, dill or rosemary, and black peppercorns provide aromatic complexity.
- → How should I store the broth after preparation?
-
Keep refrigerated up to 5 days or freeze for as long as 3 months to maintain freshness.
- → Is the broth suitable for special diets?
-
Yes, it is vegan, gluten-free, and low in fat, fitting many dietary preferences.