 Save
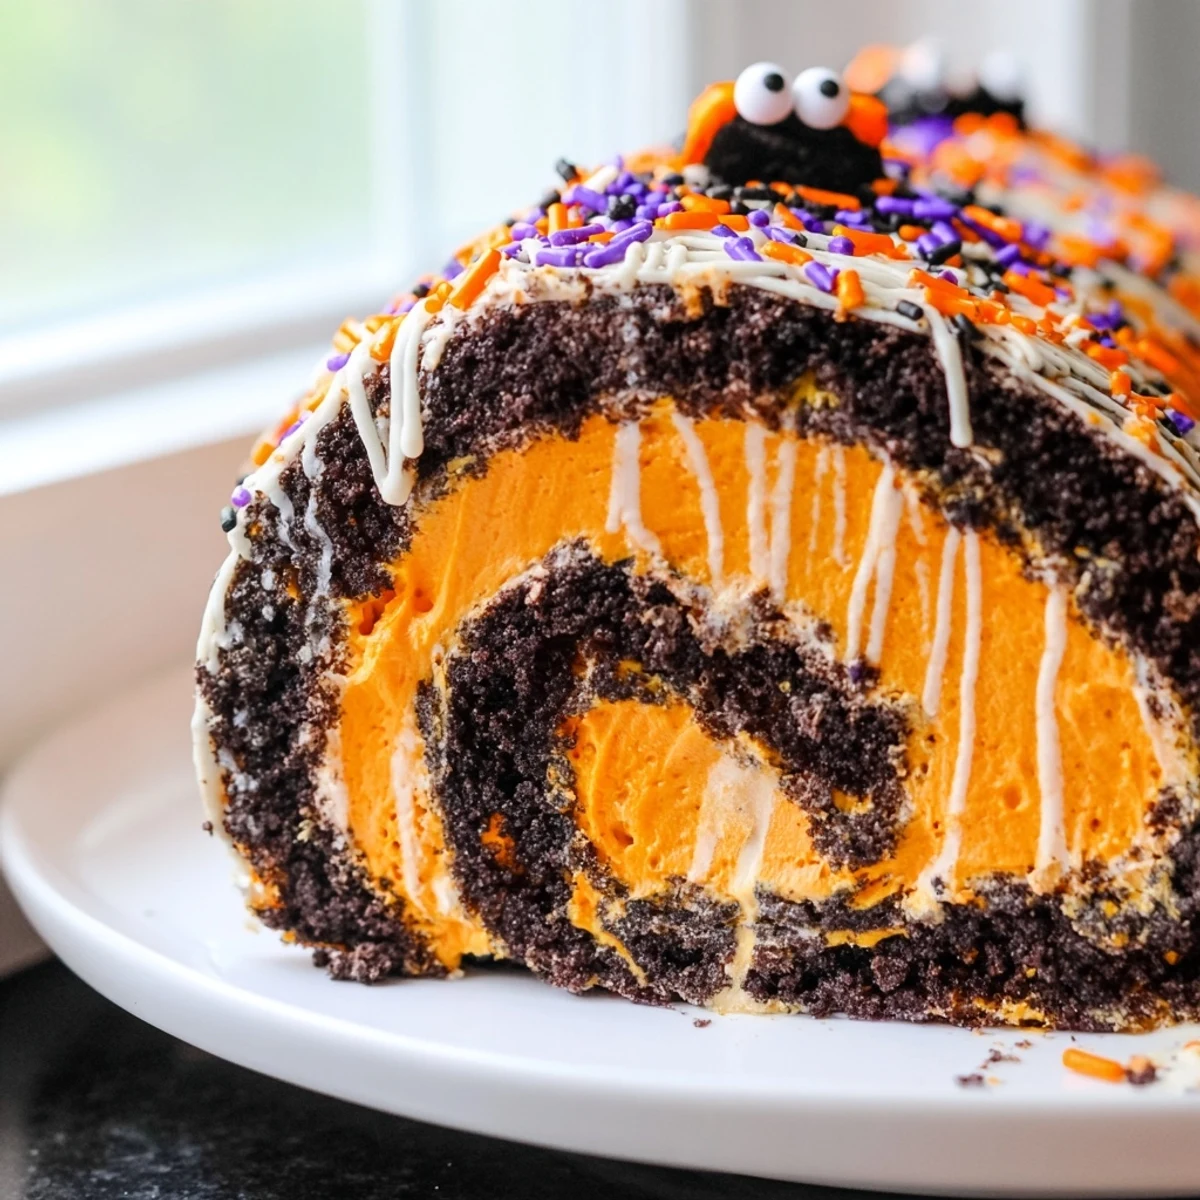
Save This totally epic Halloween Oreo roll combines crushed sandwich cookies with a colorful whipped cream filling, all rolled into a spooky log that's perfect for your Halloween celebration. The no-bake preparation makes it incredibly convenient—just 25 minutes of active time before chilling.
The base blends Halloween Oreos with cream cheese and butter for a rich, cookie-packed foundation. The filling features lightly sweetened whipped cream tinted in orange or purple, creating that signature festive look when sliced.
Top with sprinkles, candy eyes, and chocolate drizzle for maximum impact. Each slice delivers the perfect crunch-to-cream ratio that everyone loves. Best served chilled after at least one hour in the refrigerator.
The first time I attempted this no-bake wonder, my kitchen looked like a Halloween explosion had gone off. Orange food coloring somehow ended up on my cat's whiskers, and there may have been more sprinkles on the floor than in the actual roll. But when that first slice hit the table at my sister's costume party, suddenly the mess was worth it.
Last October, my niece decided she was 'too old' for Halloween desserts until this rolled beauty appeared. She hovered around the serving table, pretending to help arrange the candy eyes while casually eating three slices and declaring it the most grownup Halloween treat she'd ever encountered.
Ingredients
- 36 Halloween Oreos: The festive orange cream centers already have that spooky vibe, but regular Oreos work beautifully if you want to control your own color intensity
- 1 cup powdered sugar: This sweetens the cookie base while helping bind everything into that perfect rollable texture
- 6 tbsp unsalted butter melted: The glue that holds your cookie crumbs together into a cohesive dough that won't crumble when you roll it
- 4 oz cream cheese softened: Adds creaminess and structure to the base while balancing all that crushed cookie sweetness
- 1 cup heavy whipping cream: Whipped into clouds, this becomes your luscious filling that needs to hold its shape through rolling and chilling
- 1/4 cup powdered sugar: Just enough sweetness to transform plain cream into something special without making it cloying
- 1 tsp vanilla extract: Pure vanilla adds depth and makes everything taste homemade and intentional
- Orange or purple food coloring: Gel coloring works best here, as liquid can sometimes make your whipped cream slightly less stable
- Halloween themed sprinkles: Go wild here, bats, pumpkins, ghosts, whatever makes you smile when you open the jar
- Candy eyes: These turn your roll into a cute monster and are absolutely optional but totally worth the giggles they provoke
- Melted white or dark chocolate: The final dramatic touch that makes this look like you spent hours on something that took minutes
Instructions
- Prep your workspace:
- Line a large baking tray or even your counter with parchment paper, creating the foundation for your roll and ensuring nothing sticks when you need it most
- Build the cookie base:
- Pulse those Oreos into fine crumbs, then mix in powdered sugar, melted butter, and softened cream cheese until everything transforms into a thick, pressable dough
- Roll it out:
- Sandwich your dough between two sheets of parchment and roll into a rectangle about half an inch thick, keeping edges as even as possible
- Make the fluffy filling:
- Beat that cold cream with powdered sugar and vanilla until stiff peaks form, then gently fold in your chosen food coloring until it's exactly the Halloween shade you envisioned
- Assemble like a pro:
- Spread your colored cream over the Oreo rectangle, leaving a one inch border along one long edge, then use the parchment to help you roll everything into a tight log
- Chill completely:
- Let your creation rest in the refrigerator for at least one hour until firm enough to slice cleanly without losing its beautiful spiral shape
- The grand finale:
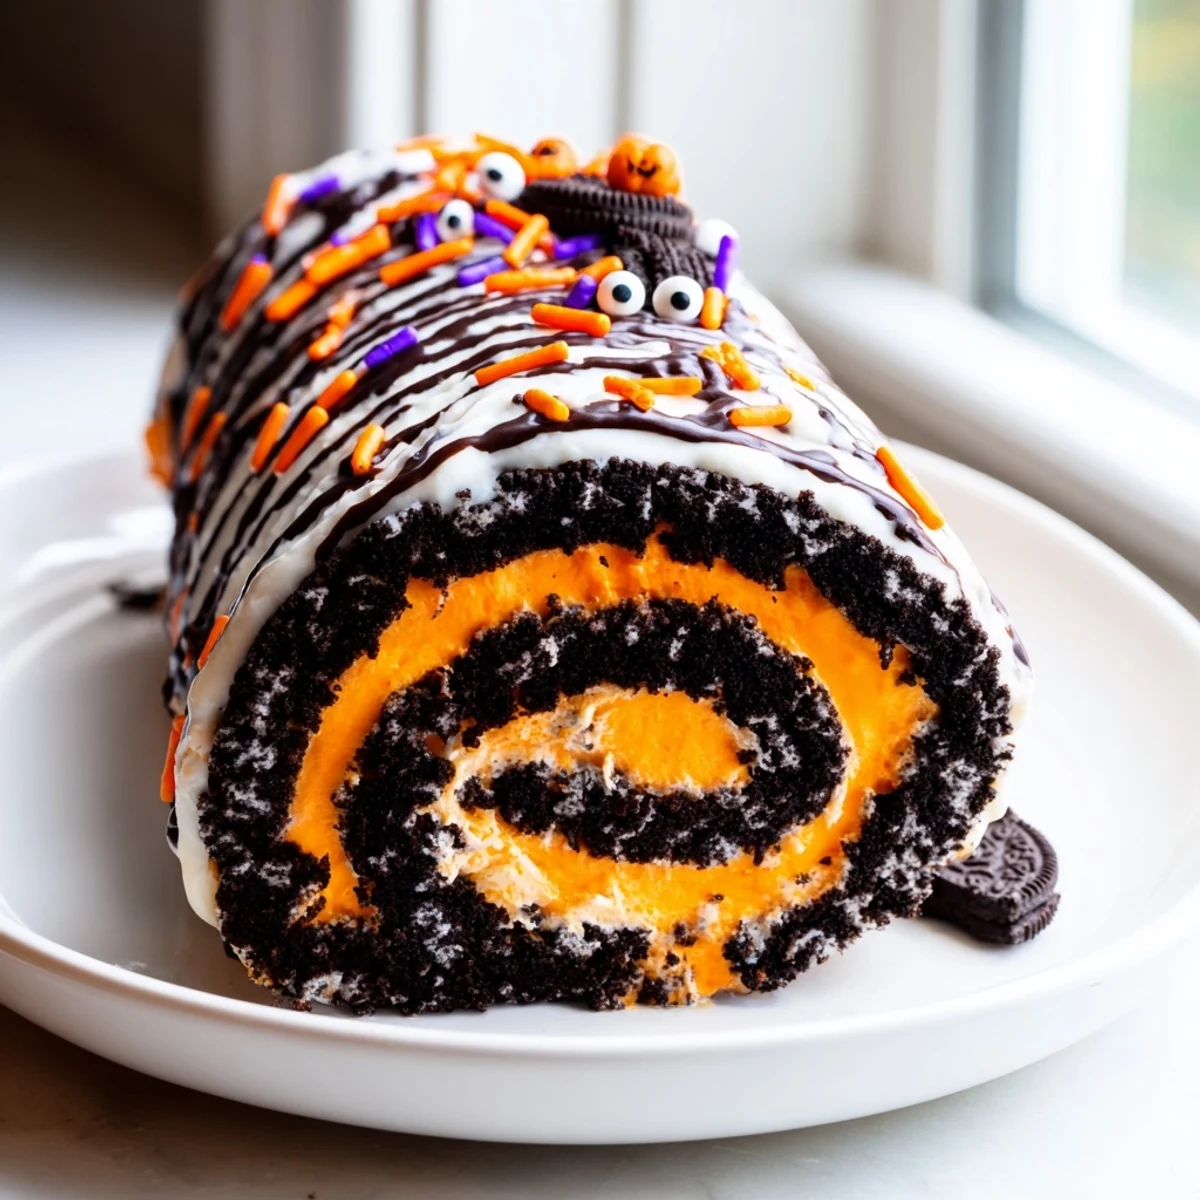
- Drizzle with melted chocolate, scatter sprinkles like confetti, arrange candy eyes playfully, then slice into one inch portions that show off that gorgeous swirl
 Save
Save There's something ridiculously satisfying about slicing into that cold roll and seeing the perfect spiral of dark cookie and bright cream. My neighbor texted me at midnight the first time I made it, demanding to know if I'd secretly gone to culinary school or if I was holding out on her with professional recipes.
Making It Ahead
This dessert actually gets better after a day in the refrigerator, as the flavors meld and the texture becomes even more cohesive. You can assemble the entire roll up to 24 hours before serving, then add your decorative drizzle and sprinkles right before guests arrive so everything looks fresh and festive.
Creative Variations
Sometimes I swap in crushed candy canes for a Christmas version, or use strawberry Oreos with pink cream for Valentine's Day. The formula works with any sandwich cookie and any holiday color scheme, making this your secret weapon for year round celebrations that look impressive but require minimal effort.
Serving Suggestions
These slices are rich enough that thin pieces satisfy completely, so you can stretch this roll further than you might expect. I like to serve them on small black plates for maximum Halloween drama, with a cup of strong coffee to cut through all that sweet, creamy indulgence.
- Use a warm knife wiped clean between slices for the cleanest cuts
- Let slices sit at room temperature for 5 minutes before serving for optimal texture
- Keep extra chilled in case of surprise guests or sudden midnight cravings
 Save
Save Enjoy watching your guests marvel at your baking skills while secretly knowing this masterpiece came together faster than you could order delivery.
Recipe FAQ
- → Can I make this ahead of time?
-
Yes! This dessert actually improves after chilling. You can prepare it up to 24 hours in advance. Store it well-covered in the refrigerator, and add decorations like sprinkles and chocolate drizzle shortly before serving for the freshest appearance.
- → What if I can't find Halloween Oreos?
-
Regular Oreos work perfectly—simply add orange food coloring to the cookie base mixture, or use them as-is for a classic look. You can also dye the whipped cream filling in your preferred Halloween colors regardless of cookie type.
- → How do I get clean slices?
-
Chill the roll thoroughly for at least the recommended hour. Use a sharp knife and wipe it clean between slices. For even cleaner cuts, briefly dip the knife in hot water and dry it before each slice—this helps prevent the filling from sticking.
- → Can I freeze this dessert?
-
Yes, you can freeze it for up to 2 weeks. Wrap it tightly in plastic wrap and then foil. Thaw overnight in the refrigerator before serving. Note that sprinkles may bleed slightly if frozen, so add fresh decorations after thawing.
- → What other decorations work well?
-
Candy corn, crushed Halloween cookies, edible glitter, or orange and purple sanding sugar all look fantastic. You can also pipe additional whipped cream rosettes along the top or arrange candy spiders for an extra spooky touch.
- → Is this suitable for gluten-free diets?
-
With one simple swap, yes! Use gluten-free sandwich cookies instead of traditional Oreos. All other ingredients are naturally gluten-free, making this an easy dessert to adapt for gluten-free guests while maintaining the same delicious taste and texture.