 Save
Save This whimsical no-bake dessert combines rich chocolate pudding with crunchy cookie crumbles to create playful dirt cups that both kids and adults adore. The creamy pudding whisks up in minutes with instant mix and milk, then gets lightened with whipped topping for an irresistible fluffy texture.
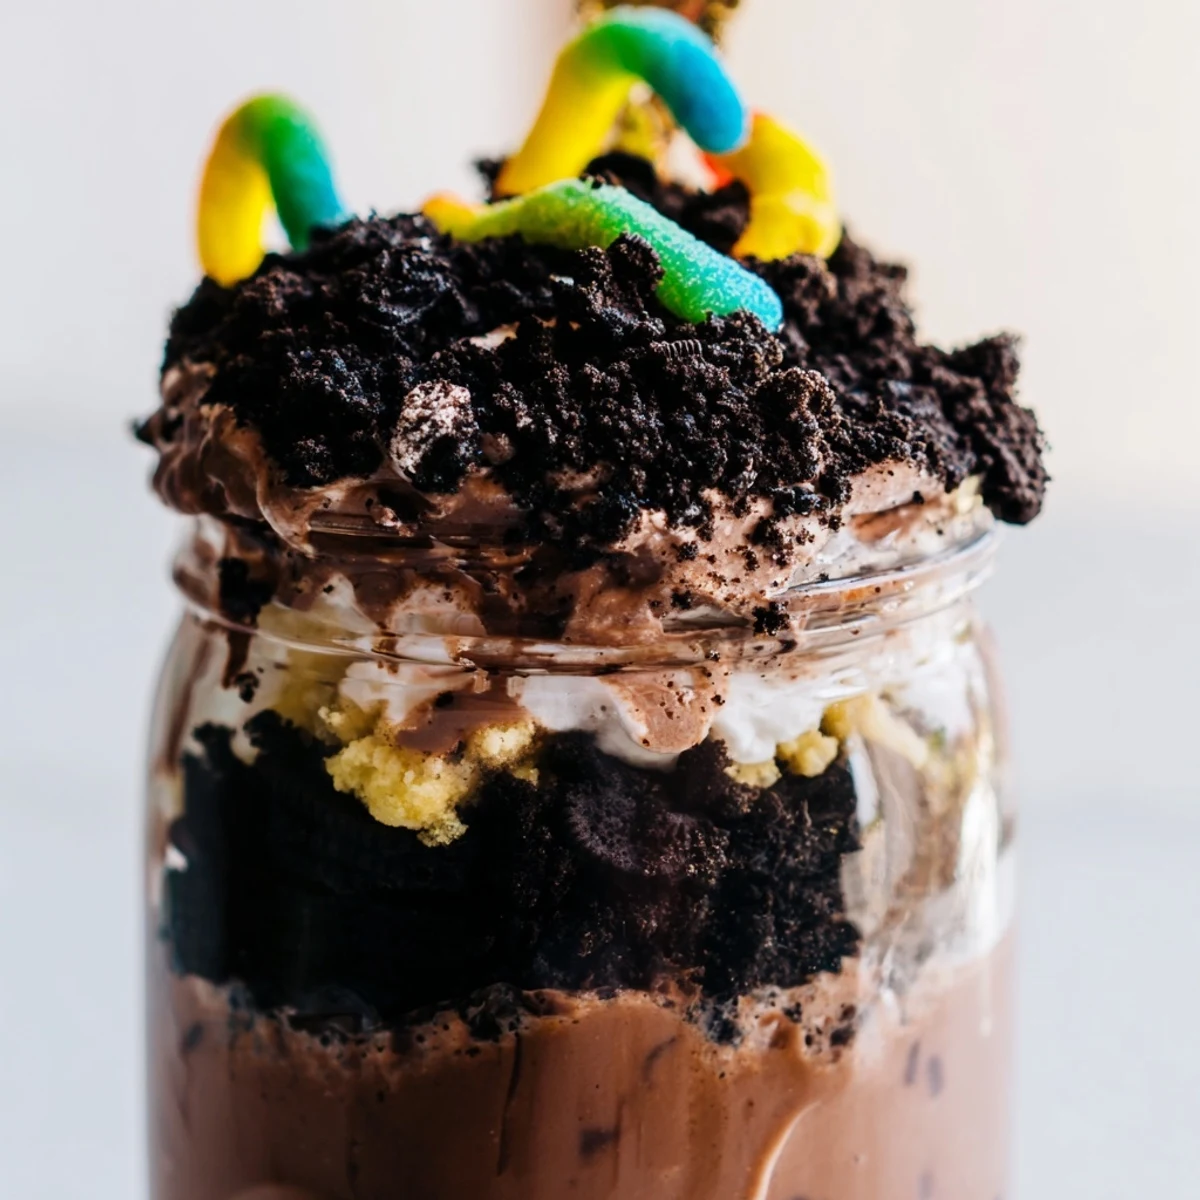
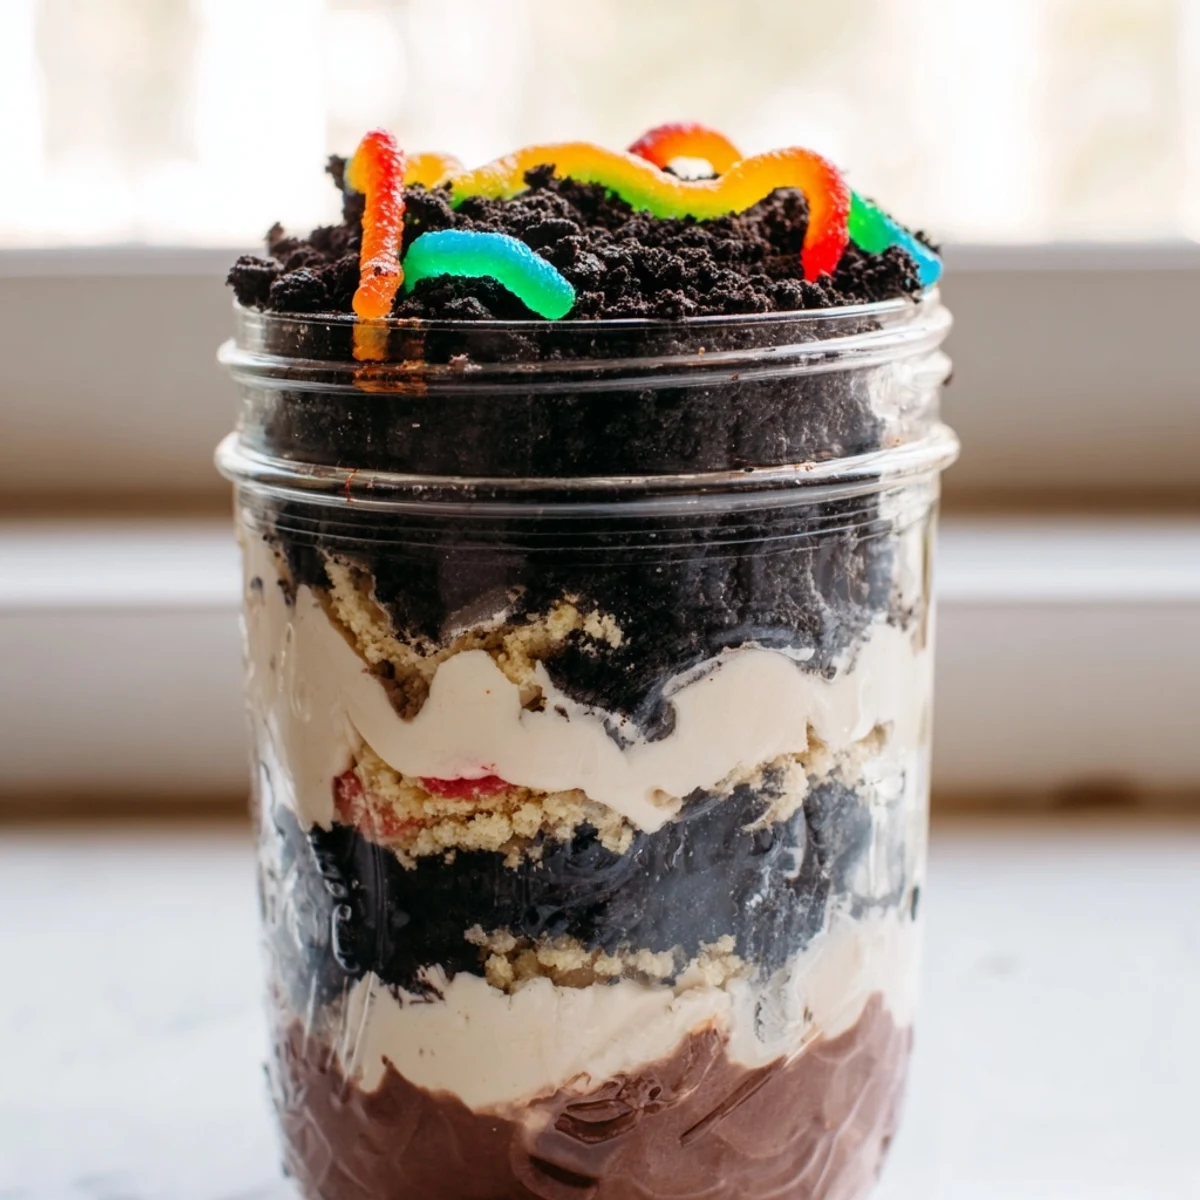
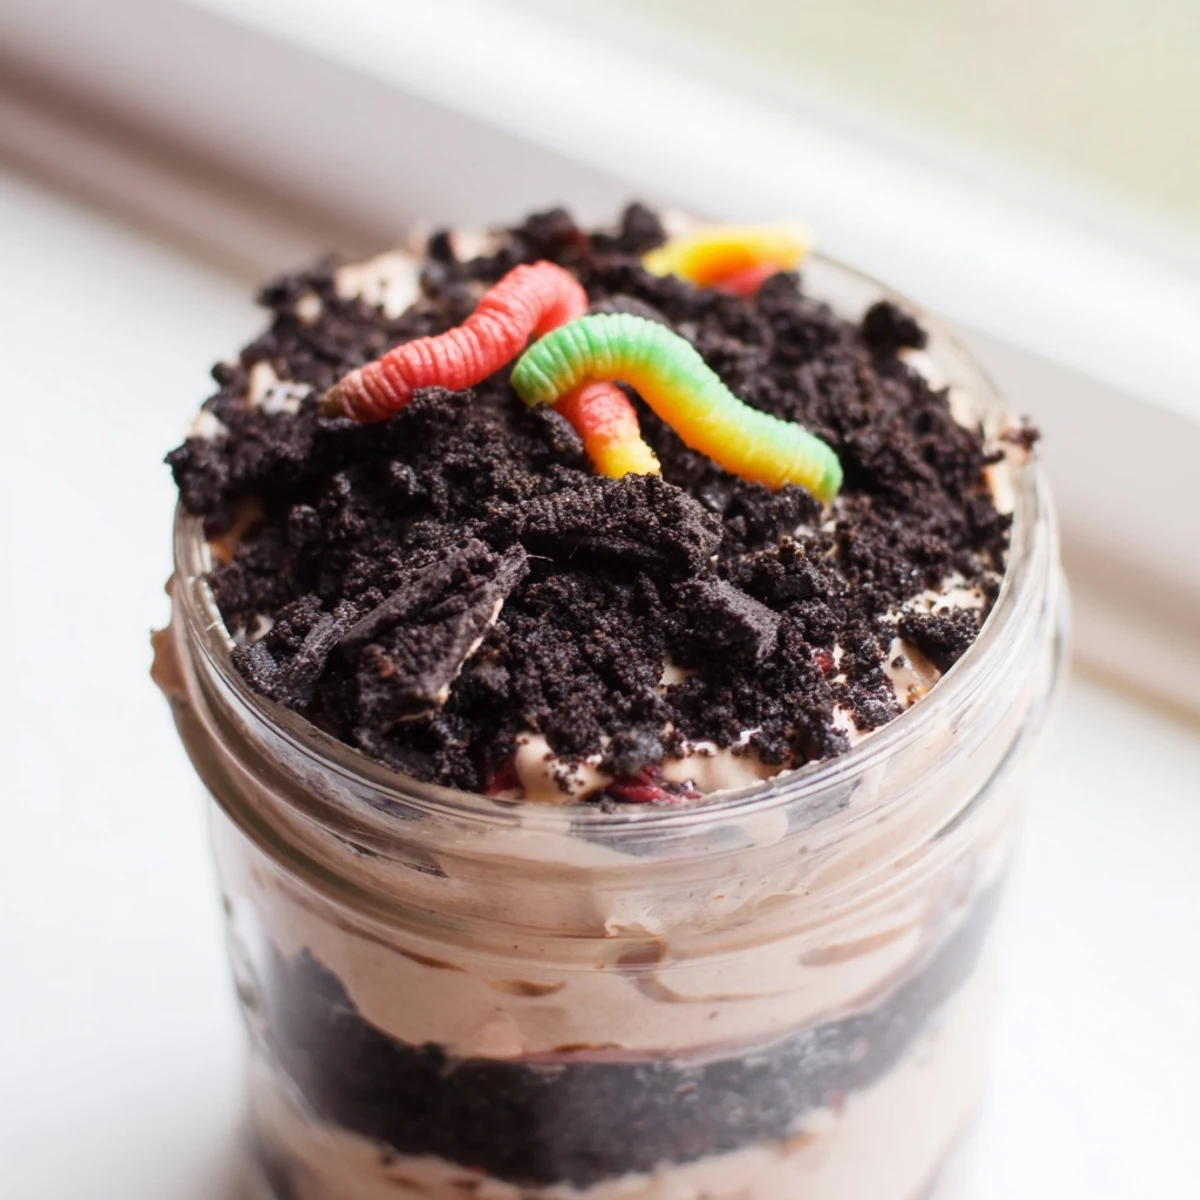
Layered between finely crushed chocolate sandwich cookies that resemble real garden soil, each cup offers a satisfying contrast of smooth and crunchy elements. The classic gummy worm decoration poking through the cookie topping adds a touch of nostalgia and makes this treat perfect for birthday parties, school events, or casual family gatherings.
Customize these cups by using gluten-free cookies, adding a cream cheese layer, or serving them in clean flower pots with artificial flowers for an impressive garden-themed presentation. Chill for at least an hour before serving to let the flavors meld and the texture set perfectly.
My daughter came home from a birthday party once absolutely buzzing about the best dessert she had ever eaten, complete with animated descriptions of worms and dirt. I admit, I was skeptical until I saw how her eyes lit up making it together in our kitchen later that week.
We made a giant batch for her 8th birthday party, and I still remember the sound of twenty children gasping when they realized there were real worms poking out of their dessert cups. The best part was watching the skeptical parents try it and immediately ask for the recipe.
Ingredients
- Instant chocolate pudding mix: The foundation of our creamy layers and the quickest path to rich chocolate flavor
- Cold milk: Use it straight from the refrigerator for proper pudding setting
- Whipped topping: Fold this in gently to create that mousse-like texture that makes each spoonful feel special
- Chocolate sandwich cookies: Oreos work beautifully but any chocolate sandwich cookie will create perfect dirt crumbs
- Gummy worms: The crowning glory that makes this dessert so whimsically memorable
Instructions
- Whisk the pudding base:
- Pour the instant pudding mix and cold milk into a large mixing bowl, whisking vigorously for 2 full minutes until the mixture thickens into a silky consistency.
- Add the fluffiness:
- Gently fold in the whipped topping with a spatula until completely incorporated, being careful not to deflate the air bubbles.
- Create the dirt:
- Crush the cookies in a food processor or seal them in a zip-top bag and roll with a rolling pin until they resemble fine soil.
- Build your layers:
- Spoon cookie crumbs into the bottom of serving cups, add chocolate pudding mixture, and repeat layers ending with a generous dirt topping.
- Add the worms:
- Tuck 2 gummy worms into each cup, positioning them so they peek out from the dirt like they are emerging.
- Chill and serve:
- Refrigerate for at least 1 hour to let flavors meld and the layers set before serving.
 Save
Save This recipe has become my go-to contribution for school functions and neighborhood potlucks because it travels so well and always disappears first. There is something universally delightful about eating dirt for dessert that brings out the child in everyone.
Serving Vessel Magic
I have served these in everything from clear glass jars that show off the layers to actual clean flower pots for garden parties. Individual servings make the experience feel special, and transparent cups let guests admire the strata before digging in.
Make Ahead Strategy
You can prepare the components separately up to 24 hours in advance, keeping the pudding mixture covered and the cookie crumbs in an airtight container. Assemble everything just before serving to maintain that crucial contrast between creamy pudding and crunchy dirt.
Flavor Variations
The basic formula is incredibly forgiving and welcomes experimentation with different flavors and textures. Once you master the classic version, these variations can keep things interesting for different occasions and palates.
- Swap chocolate pudding for butterscotch or vanilla for a lighter take
- Add a layer of sweetened cream cheese mixture between the dirt and pudding for extra richness
- Use gluten-free sandwich cookies to accommodate dietary restrictions without sacrificing the experience
 Save
Save Whether you are making this with children or just embracing your inner child, Dirt Pudding never fails to spark joy and conversation at the table.
Recipe FAQ
- → Can I make dirt pudding ahead of time?
-
Yes, prepare these cups up to 24 hours in advance. The cookie crumbs will soften slightly from the pudding moisture, creating a more cohesive texture. Store covered in the refrigerator until ready to serve.
- → What type of cookies work best for the dirt layer?
-
Chocolate sandwich cookies like Oreos are traditional and provide the dark color that resembles soil. You can also use chocolate wafers, graham crackers mixed with cocoa powder, or even vanilla sandwich cookies for a lighter appearance.
- → Can I use homemade pudding instead of instant mix?
-
Absolutely. Cooked chocolate pudding made from scratch or a box mix that requires heating will work beautifully. Just ensure it cools completely before layering with the whipped topping and cookie crumbs.
- → How do I make dirt pudding gluten-free?
-
Use certified gluten-free chocolate sandwich cookies and verify that your instant pudding mix is gluten-free. Many brands offer gluten-free versions of both ingredients, making this dessert easily adaptable for those with gluten sensitivities.
- → What other decorations can I add?
-
Get creative with edible decorations like candy rocks, chocolate flowers, or crushed mint leaves for greenery. Some people add a layer of cream cheese frosting, sprinkle with chocolate sprinkles, or top with fresh berries for a colorful twist on the classic presentation.
- → Can I make this in a large bowl instead of individual cups?
-
Yes, assemble all layers in a 9x13 inch dish or large trifle bowl. Simply alternate cookie crumbs, pudding, and decorations in layers, ending with a generous topping of cookie crumbs. Guests can scoop out portions, revealing the worm decorations throughout.