 Save
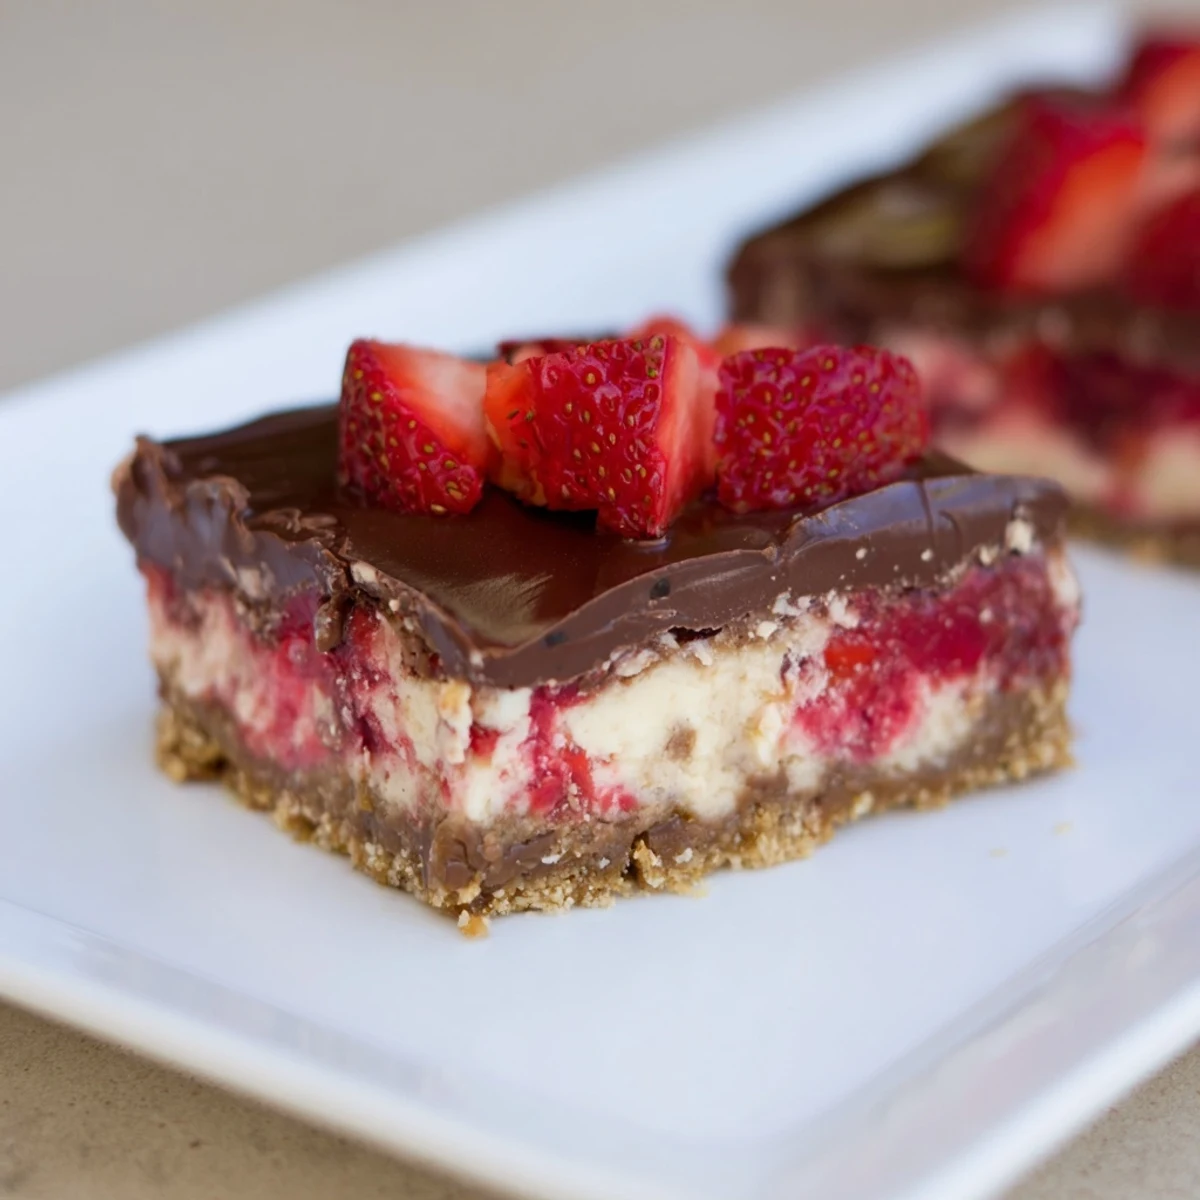
Save These cheesecake bars combine a buttery graham cracker crust with a smooth cream cheese layer. A sweet strawberry swirl adds freshness and tartness, enhanced by a glossy chocolate topping. After baking, the bars chill until firm and are garnished with fresh strawberry halves. Perfect for celebrations or a special treat, these bars offer balanced textures and rich, fruity flavors.
The kitchen smelled like a bakery and a chocolate shop had collided, and I was standing there in my pajamas at 11 PM wondering if I had lost my mind. My neighbor had texted that she was stopping by with wine in twenty minutes, and I had promised dessert like some kind of delusional overachiever.
She arrived to find me still swirling jam into cheesecake batter with a butter knife, chocolate smeared on my cheek from taste testing. We ate them straight from the pan with plastic forks, and she still asks for them every time she visits.
Ingredients
- Graham cracker crumbs: The foundation that holds everything together, and pressing them firmly prevents that sad crumbling when you slice
- Unsalted butter: Binds the crust and carries flavor, melted completely so no dry pockets survive
- Granulated sugar: Sweetens without competing, a small amount in the crust balances the tang to come
- Cream cheese: Must be genuinely softened or you will fight lumps until you cry, I have learned this twice
- Eggs: Room temperature for seamless blending, cold eggs shock the batter into graininess
- Vanilla extract: Pure vanilla transforms the flavor from flat to dimensional, worth the extra dollar
- Sour cream: Adds subtle tang and silkiness, full fat keeps the texture luxurious
- Fresh strawberries: Dice small or they sink and create soggy craters, learned from a collapsed batch
- Strawberry jam: Concentrates berry flavor without excess moisture, seedless looks cleaner
- Lemon juice: Brightens the fruit layer, just enough to wake everything up
- Semi-sweet chocolate chips: Melts smoothly with butter, bittersweet works if you prefer less sweetness
- Fresh strawberries for garnish: Halved and placed cut side up, they signal what hides inside
Instructions
- Make your escape route:
- Line the pan with parchment leaving wings on two sides, this is how you will lift the whole beautiful slab out later without destruction
- Build the foundation:
- Stir crumbs with melted butter, sugar, and salt until it looks like wet sand, then press firmly with the bottom of a measuring cup so it holds when sliced
- Whip the cheesecake:
- Beat cream cheese until no lumps remain, add sugar gradually, then eggs one by one with patience between each, finish with vanilla and sour cream for that satiny texture
- Spread and swirl:
- Pour the batter over the slightly cooled crust, then dot the strawberry mixture across the surface and drag a knife through it once or twice, resist the urge to overwork or you will muddy the colors
- Bake with faith:
- The center should still jiggle slightly when you pull it, it will firm as it cools and the refrigeration will do the rest
- Chill completely:
- Four hours minimum, overnight is better, the texture transforms from soft to sliceable during this wait
- Glaze and finish:
- Melt chocolate and butter gently, cool until thick but pourable, spread quickly before it sets, then arrange strawberry halves while the chocolate is still tacky
 Save
Save My niece asked for these for her birthday instead of cake, and watching her carefully transport a bar to her plate like it was treasure made the effort feel small. Food that makes someone pause before eating has already done its job.
The Waiting Game
The four hour chill feels designed to test your willpower, and I have failed it more than once. The texture when cold is worth every minute of restraint, warm cheesecake bars slump and lose their clean edges.
Swirling Without Panic
My first attempt looked like a crime scene because I dragged the knife through twenty times chasing perfection. Three deliberate passes creates the marbled effect, anything more blends into a murky pink.
Serving and Storing
A hot knife wiped clean between slices gives you those bakery display case edges. The bars keep beautifully for three days, though the fresh strawberries on top will weep slightly after the first day.
- Slice with confidence, hesitating drags the layers
- Store uncovered for the first hour so condensation does not ruin the chocolate top
- Bring to cool room temperature for ten minutes before serving for fullest flavor
 Save
Save Some recipes earn their place through repetition, and this one has become my answer to almost every dessert obligation. Make them once and you will understand why the pan always comes home empty.
Recipe FAQ
- → Can I use frozen strawberries for the filling?
-
Fresh strawberries are recommended for the best texture, but thawed frozen strawberries can be used if fresh are unavailable. Drain excess juice before using.
- → What is the best way to melt the chocolate topping?
-
Use short microwave bursts of 20 seconds, stirring in between to avoid burning. Alternatively, melt over a double boiler on low heat.
- → How long should the bars chill for optimal texture?
-
Chilling for at least 4 hours is ideal to ensure the layers set firmly and flavors meld well.
- → Can the crust be made gluten-free?
-
Yes, substitute regular graham cracker crumbs with gluten-free alternatives to accommodate dietary needs.
- → Is it possible to swap strawberries for other fruits?
-
Fresh raspberries or blueberries can replace strawberries, offering different fruity twists while maintaining balance.
- → How should the bars be stored after preparation?
-
Keep refrigerated in an airtight container for up to 3 days to preserve freshness and texture.