Save
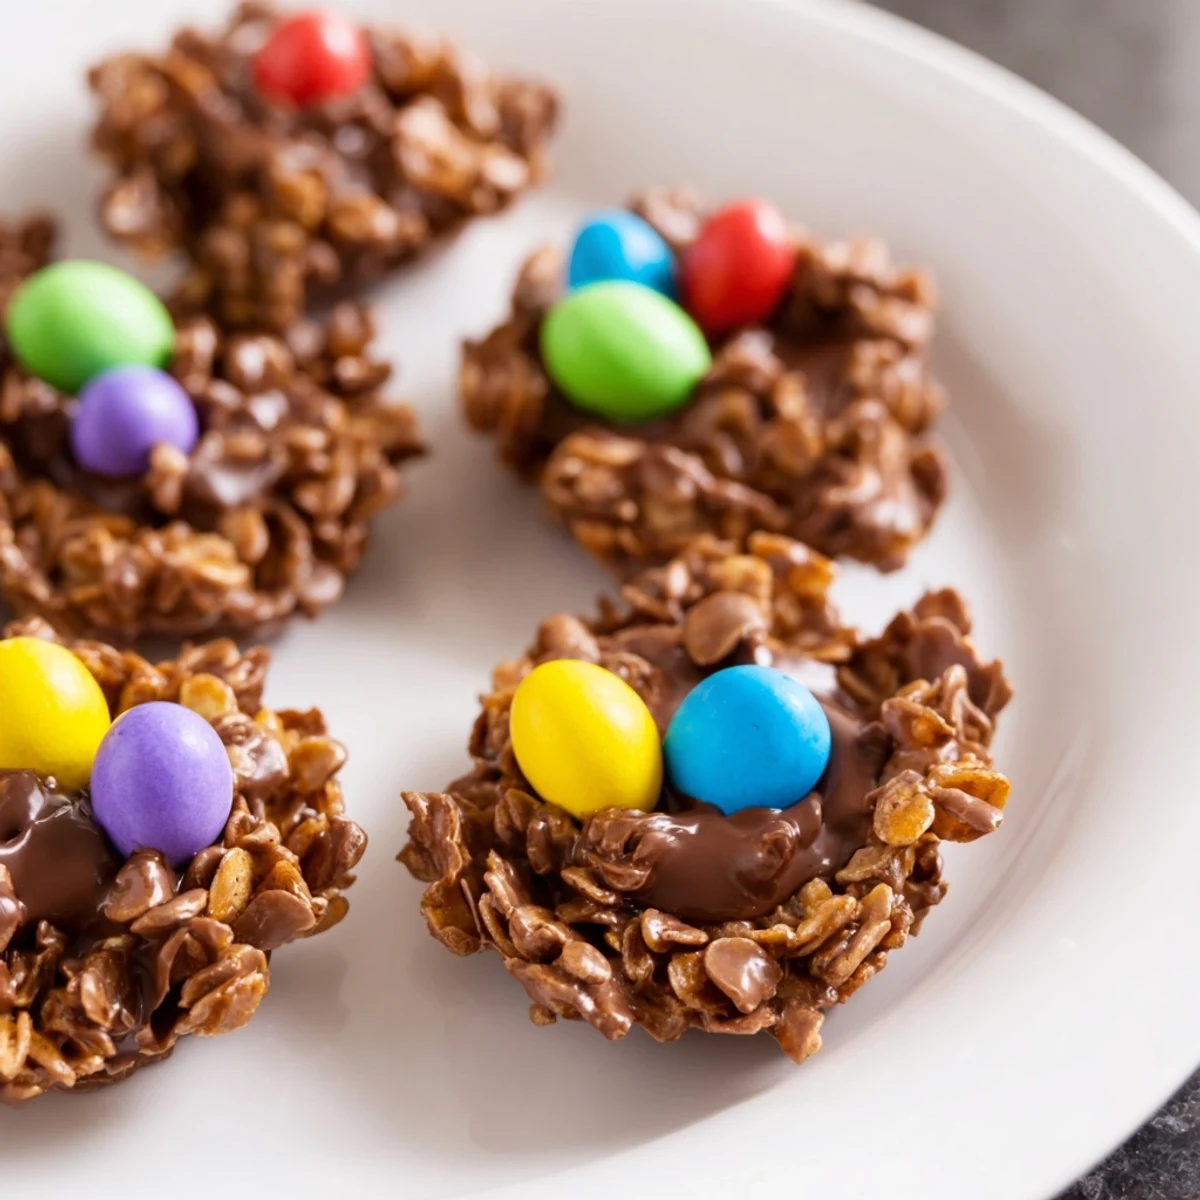
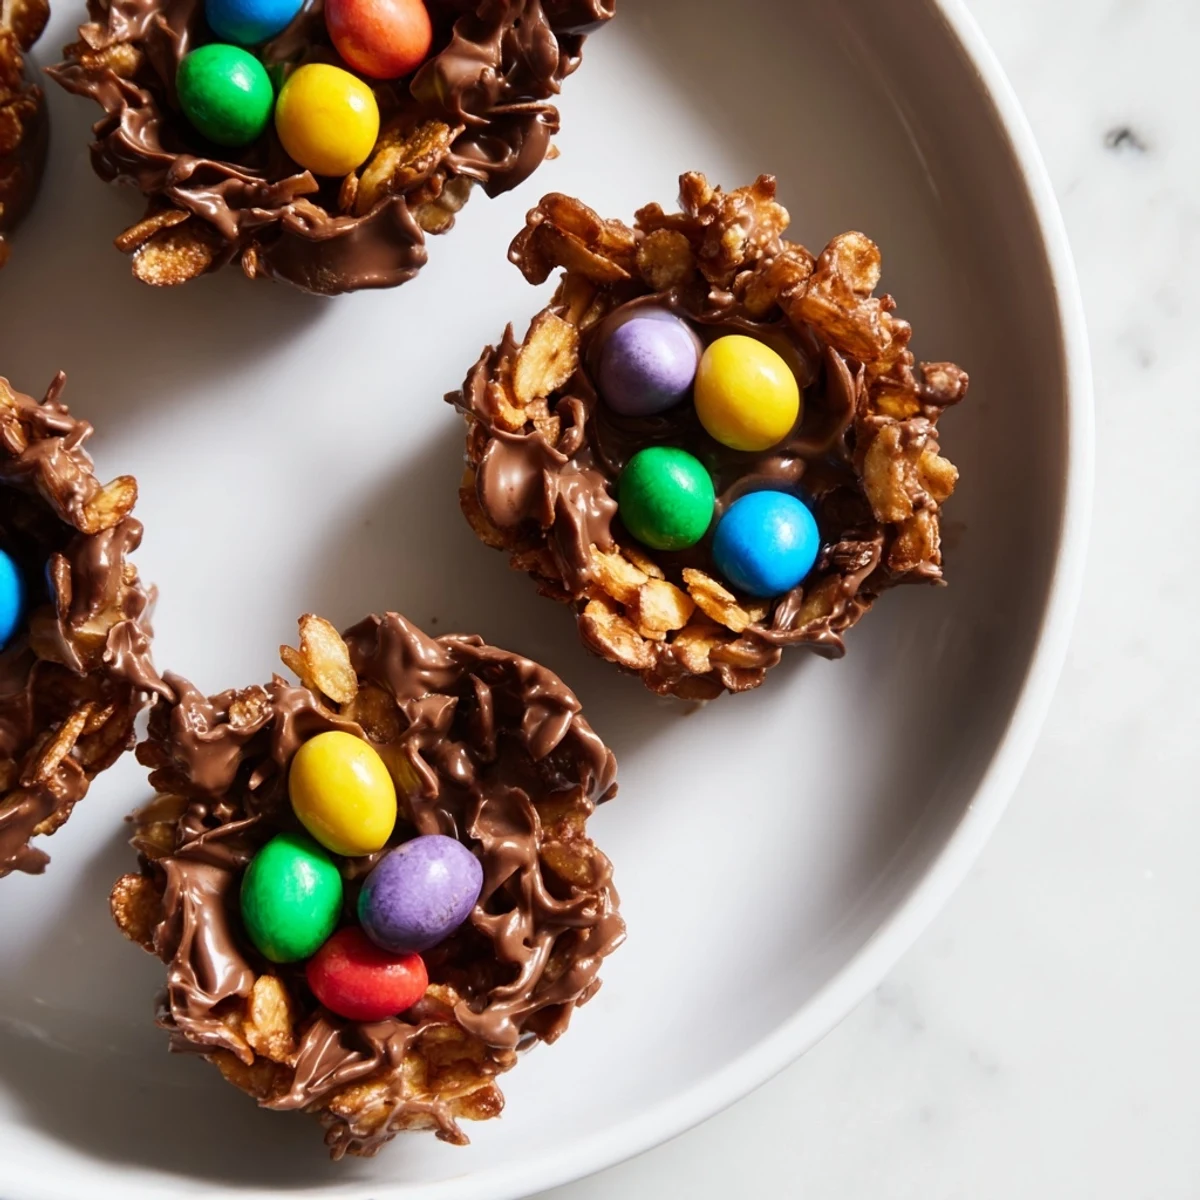
Save This no-bake treat features a rich blend of melted milk and dark chocolate combined with golden syrup and butter, creating a smooth base. Crunchy cornflakes add texture as they’re gently folded into the chocolate mixture. The chocolate-covered clusters are shaped into nests using paper cases, then decorated with colorful candy eggs to bring a festive touch. After chilling until set, these vibrant nests offer an easy and enjoyable dessert option that combines creamy, crunchy, and sweet elements ideal for Easter gatherings.
The kitchen counter was covered in tiny chocolate fingerprints before these nests even made it to the fridge. My niece took her job as official egg placement specialist very seriously, carefully arranging three candy eggs in each nest while stealing suspicious glances at the melting chocolate bowl.
Last Easter I made double batches because they disappeared so quickly at our family brunch. Even my brother-in-law who claims he does not like sweets ended up sneaking back for thirds.
Ingredients
- 200 g milk chocolate and 100 g dark chocolate: The combination gives these nests depth and richness without being too sweet
- 100 g unsalted butter: Helps the chocolate set properly while keeping it smooth and glossy
- 3 tbsp golden syrup: This is the secret ingredient that keeps the chocolate coating soft and fudgy
- 100 g cornflakes or shredded wheat: Cornflakes give a lighter crunch while shredded wheat creates that authentic twiggy nest look
- 100 g mini candy-coated chocolate eggs: These are essential for the classic Easter nest appearance
Instructions
- Prep your nests:
- Line a 12-hole muffin tin with paper cupcake cases so you are ready to fill them quickly
- Melt everything together:
- Set a heatproof bowl over simmering water and melt both chocolates with butter and golden syrup until perfectly smooth
- Add the crunch:
- Gently fold in the cornflakes until every piece is lightly coated but not drowning in chocolate
- Shape the nests:
- Divide the mixture among the cases and press lightly with a spoon to create that little hollow in the center
- Nestle in the eggs:
- Place 2 or 3 mini eggs right in the middle of each chocolate nest while they are still soft
- Let them set:
- Chill for at least 30 minutes until firm then carefully peel away the paper cases
 Save
Save These became an instant tradition after the year I forgot to make dessert and threw them together as a last-minute save. Now nobody cares what else is on the Easter menu.
Making Them Your Own
Shredded wheat creates such a convincing nest appearance that people always ask where I found them. I sometimes add crushed toasted hazelnuts to the chocolate mixture for a sophisticated twist adults love.
Getting The Texture Right
The chocolate should coat the cereal lightly like a delicate glaze rather than drowning it. I always test one piece of cereal before mixing everything in to ensure that perfect balance of crisp and chocolate.
Storage And Timing
These actually improve after a day in the fridge as the flavors meld together beautifully. Make them up to a week ahead but keep them hidden in the back of the refrigerator.
- Bring them to room temperature for 10 minutes before serving
- They travel well if packed in a single layer
- The paper cases peel off easiest when the nests are slightly chilled
 Save
Save There is something magical about how something so simple brings out the kid in everyone. Happy Easter.
Recipe FAQ
- → Can I substitute any ingredients for dietary needs?
-
Yes, you can replace cornflakes with gluten-free options or shredded wheat for texture. To make it vegan, consider using dairy-free chocolate and butter alternatives.
- → How do I shape the nests properly?
-
Use a muffin tin lined with paper cases and press the chocolate-cornflake mix gently to form a hollow center, creating a nest shape for the candy eggs.
- → What’s the best way to melt the chocolate mixture?
-
Melt milk and dark chocolate with butter and golden syrup in a heatproof bowl over simmering water, stirring until smooth and fully combined.
- → How long should the nests chill before serving?
-
Place the nests in the refrigerator for at least 30 minutes to allow them to firm up properly before removing from the cases and serving.
- → Can I add nuts for extra flavor?
-
Absolutely. Adding chopped roasted hazelnuts or almonds provides a delightful nutty twist and additional crunch to the nests.
- → How should I store the finished nests?
-
Store them in an airtight container in the refrigerator for up to one week to maintain freshness and texture.